


Last year the Make it Crafty gals set a challenge to colour lighting. Now I have to say it scared me when I read the challenge and I had to think long and hard about HOW to start. As I often tell people drawing is NOT a skill I can lay claim to - LOL. So how to create lightning????? I finally figured out a way so I thought I'd share it here with you.
Google is my friend - and I'm sure many of you can relate! I started the challenge by googling lightning images and finding this one which I saved to my computer. Print out the picture to the size you want.

Using some tracing paper trace the lightning - this does NOT have to be accurate - no-one will know where your original picture looked like and it's just used as a guide. You can orientate the lightning to suit your picture - in the picture I coloured for the original challenge I down-sized the lightning and pointed it upward - see below....

You'll see I finished the lightning off with some yellow in this picture - it has ALWAYS annoyed me that I took this extra step and you'll see I don't use it in this version! Now back to our lightning....

Transfer the lightning onto your colouring medium - use a soft pencil as you want to erase this line later. I start with the lightest colour to "set the scene". Make sure you place this as a border around your lightning line as you want to leave the lightning area white.

Gradually build out the colour and blend slightly. I find it easier to flick my colour towards the lighter colour as I'm fairly heavy handed and the hard edge where I start will be covered by the next and darker layer.
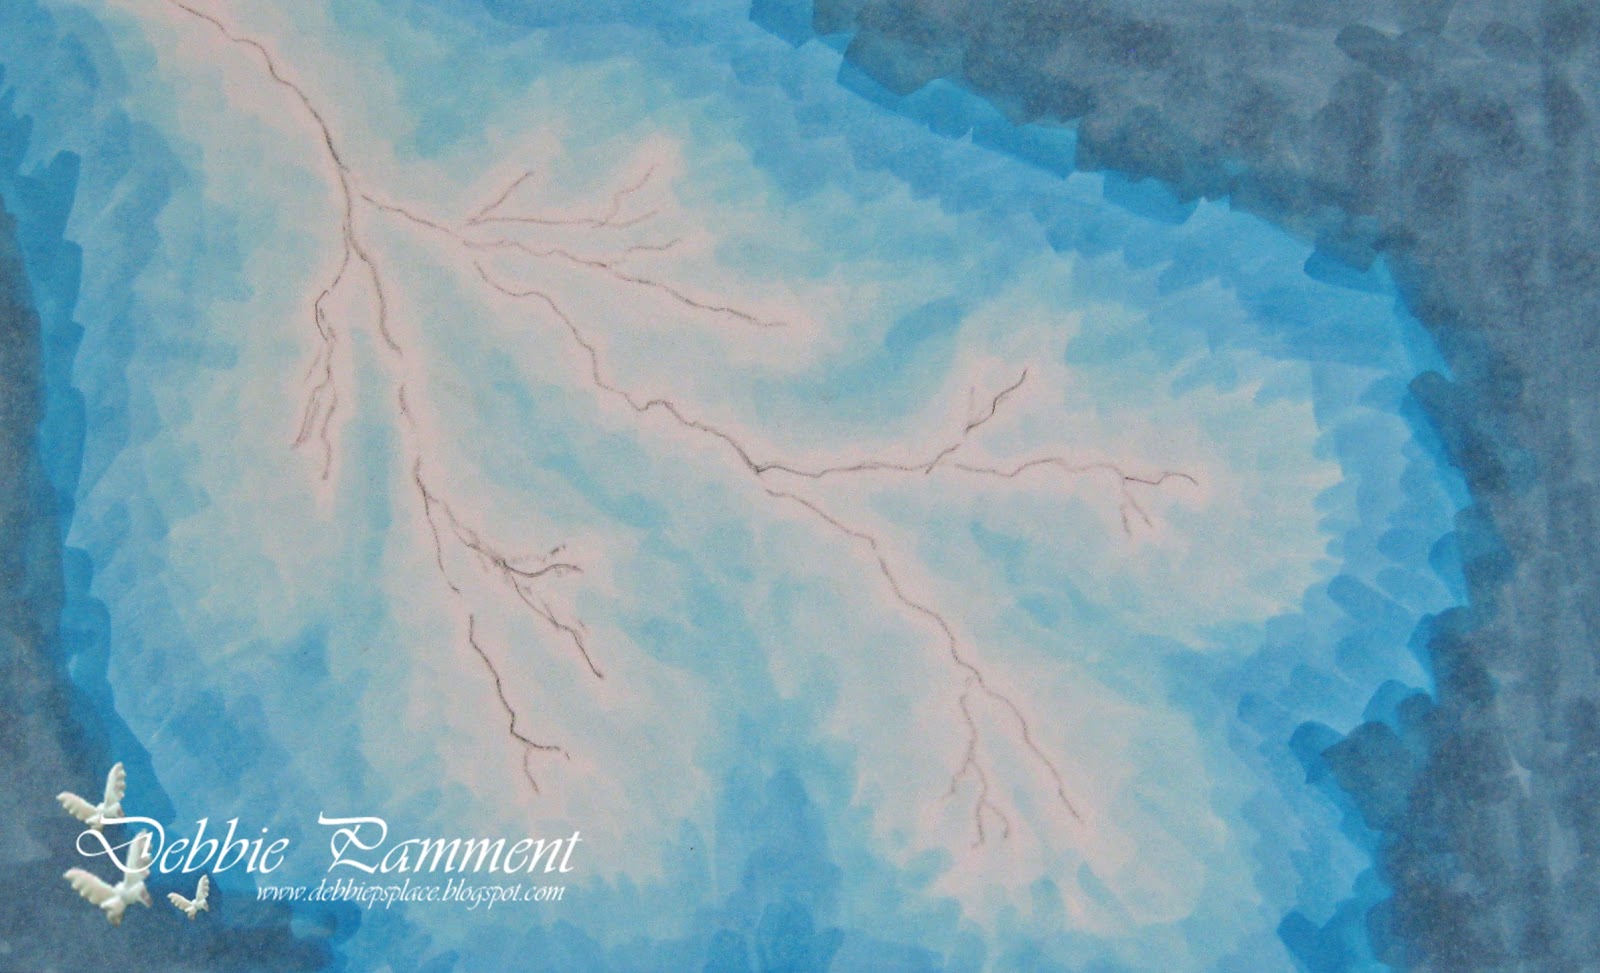
Keep adding your colours and blending lightly as you go. Then go backwards from darkest back to lightest to keep blending and adding definition to your lightning forks.

You don't need to get the the blending completely smooth - but you can see how much better it looks with a little bit of work.

When you are happy with the result erase the pencil marks and there you go - lightning! And don't you agree it looks much better without the yellow?!?!?!

Make it Crafty Products -
Previous Picture MiC Products -
Copics used - B0000, B000, B00, B02, B05, B06, B97


9 comments:
Debbie this is just fabulous and such a great tutorial!! Don't know if I would be brave enough to try but its just perfect for Halloween!! Love Chanelle xxx
Debbie, this looks amazing!! Great idea to use a printed lightening image. Beautiful Halloween card! ~jeni :)
WOW!! This looks fantastic. Thanks so much for such clear instructions on how you achieved such a great effect
Sue
So gorgeous card Debbie.
Hugs Riet.xx
Wow! Thanks so much for sharing that idea! It is so effective!
WOW this is fabulous! Thanks for sharing this awesome technique!!!
Awesome!! Thanks for the tutorial, you're coloring is fantastic, I still love seeing that original one. Way cool!
;)
WOW!! Debs this is amazing! What a fabby tutorial and I love the effect :)
Super cool tutorial, Debbie! Glad y used pencils for this one. I can try it for myself! Yes! I agree ... Better without the yellow! Hugs xx
Post a Comment