Pages

Sunday, October 16, 2022

Autumn Witch by Twistoon Stamps


Well I did it - I tried to make a video tutorial of my colouring of this image called Autumn Witch - but it's so much harder than it looks! I have uploaded the finished result in case you wish to check it out ;) 

Please note that at the end of the video I didn't like the right hand side of her hair above the leaf - so I darkened the shadows there with C10.

Link to video is HERE

Image printed at 12cm tall

 Skin - R11, R20, E000, E00, E 11, E13

Eyes - YR17, YR01, Black, White

Lips - YR07, YR12

Hair - V05, V06, V09, V12, YR15, C10

Clothes (Hat & Dress) - C0, C2, C4, C5, YG0000, YG01, YR00, YR000

Neck Bow and Hat Ribbon - C4, YG01, YG17, G28, V12

Nails - Black, White

Pumpkins - E07, E19, YR07, YR15

Pumpkin Vine & Leaves - G28, YG17, YG63, (+ YR00, YR21 for leaves)

Broomstick - E18, E29, E74

Broom Brush - Y21, Y26, Y28

Cats - B05, YO4, R20, C10, White

Mouse - R20, Y04, C4, C2, White

Saturday, October 15, 2022

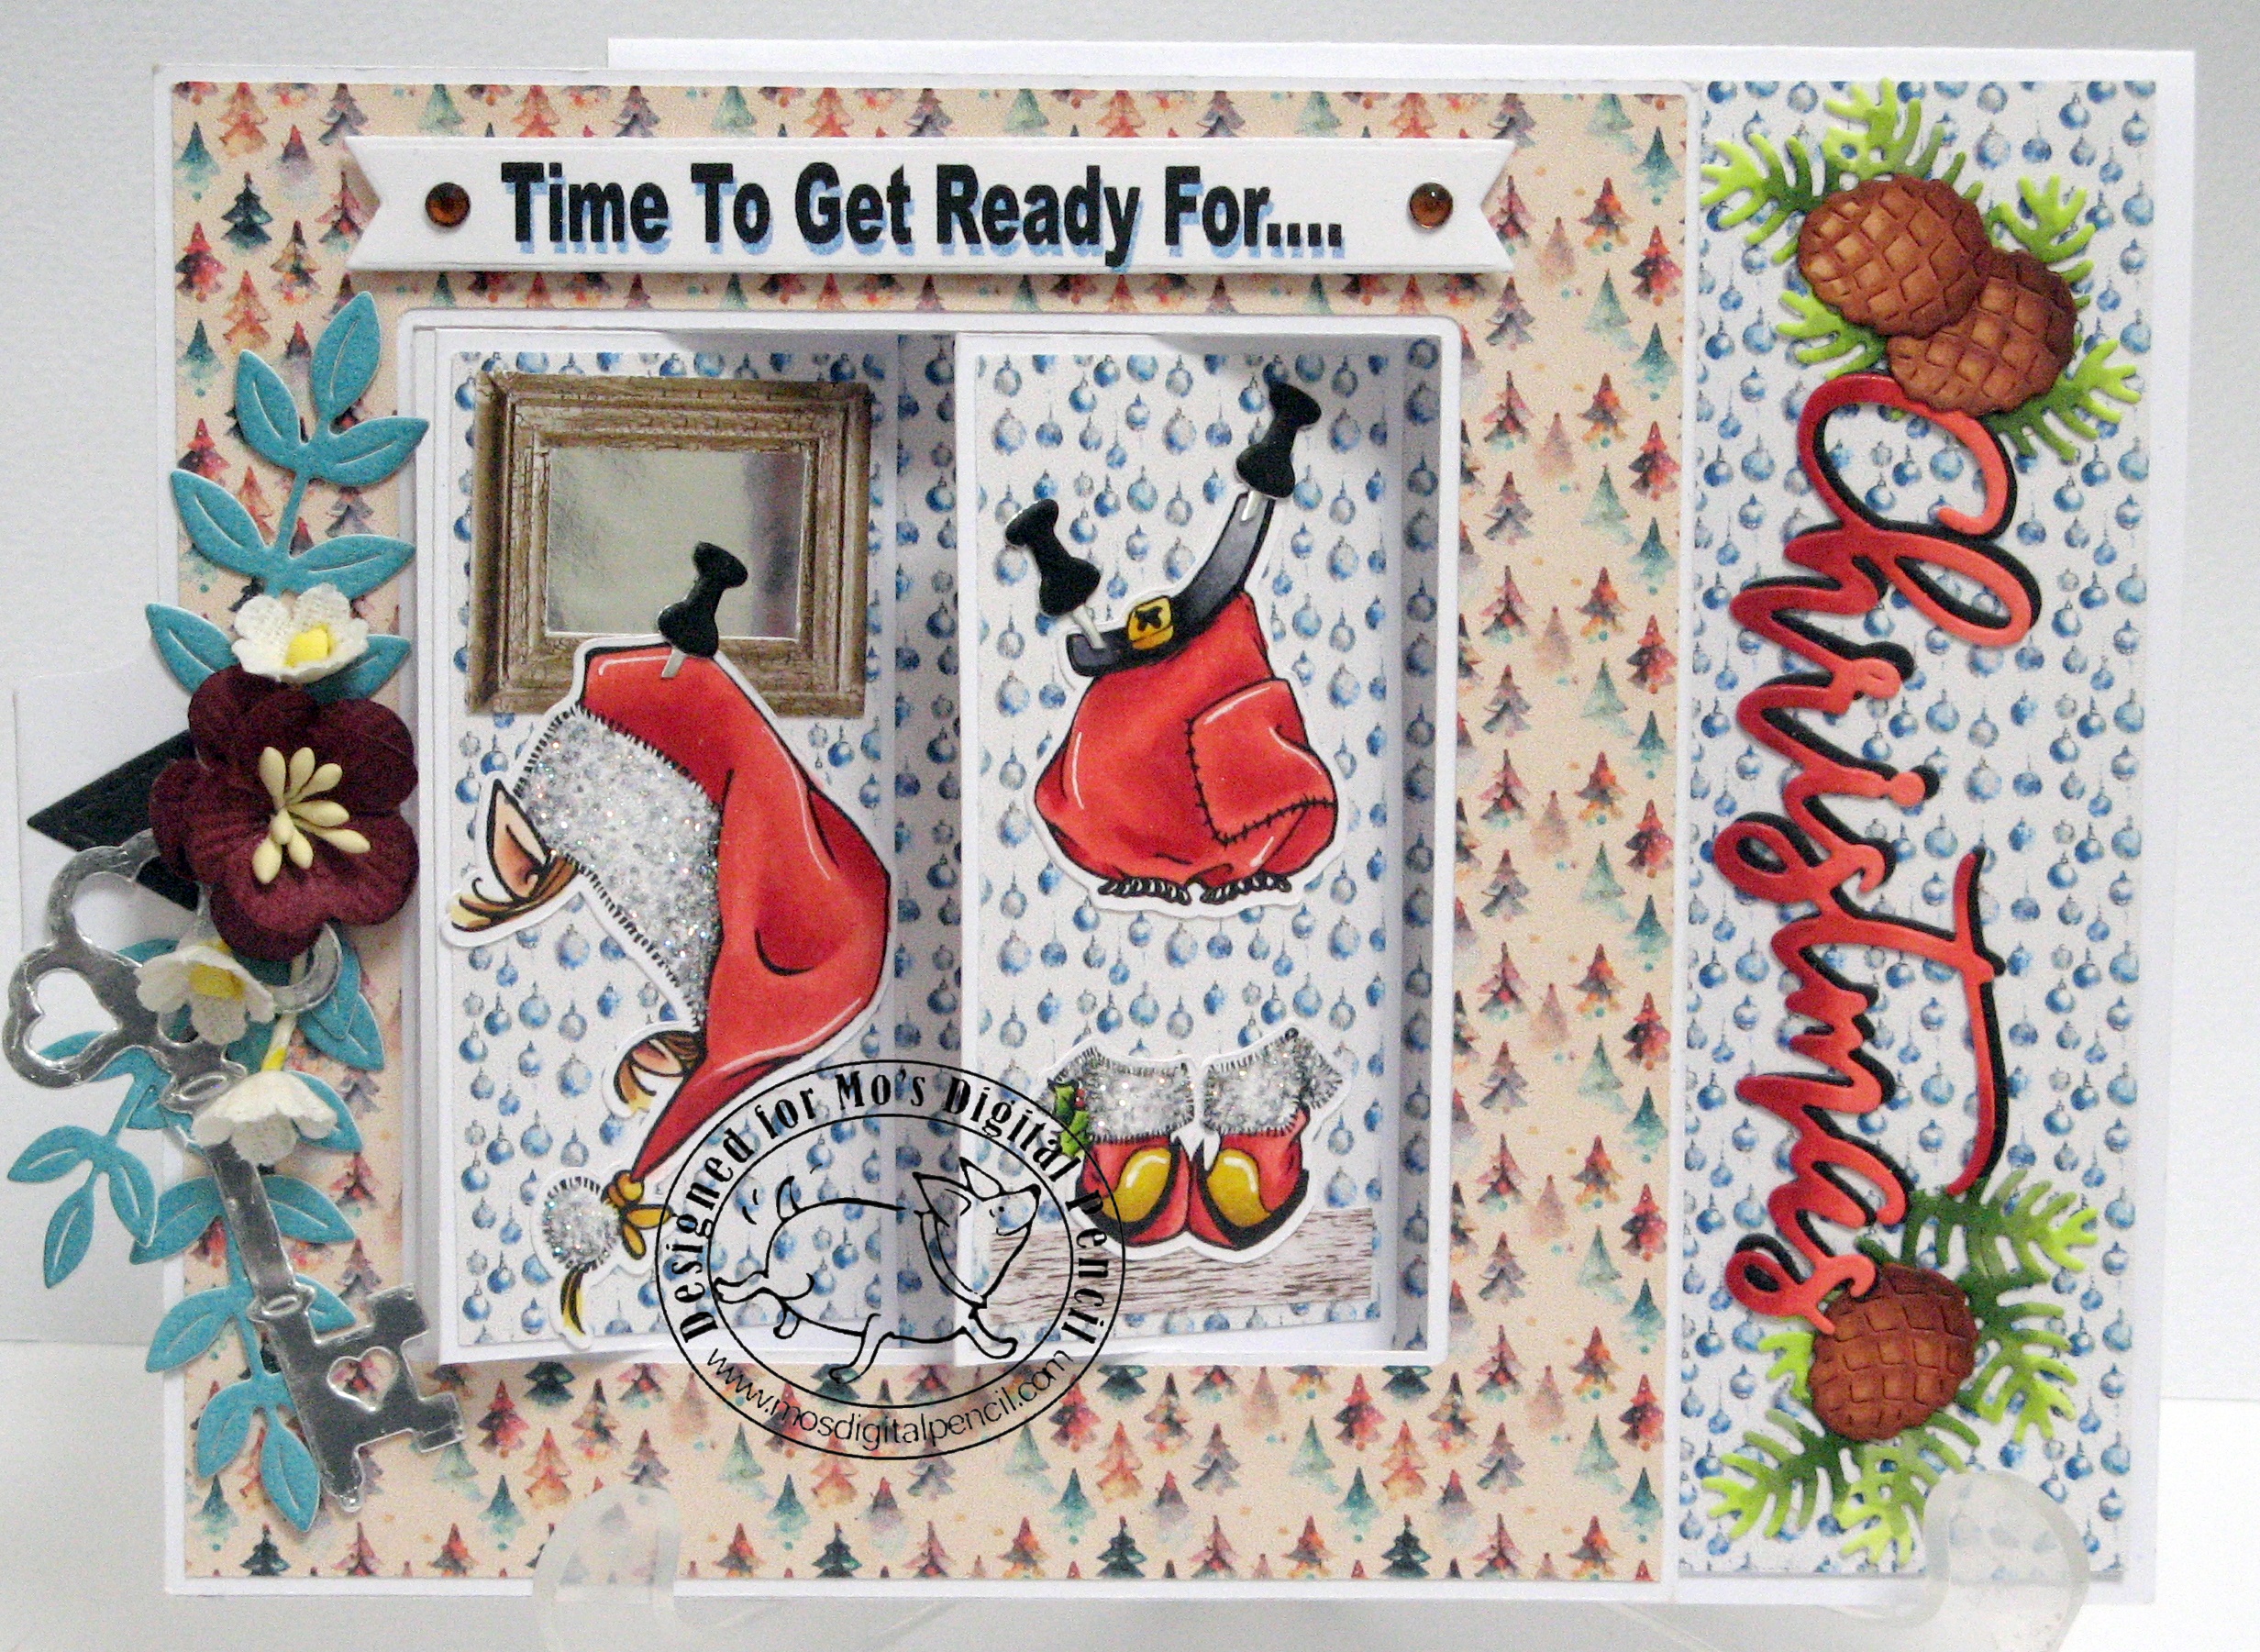
Getting Ready for Christmas


Recently I saw a friend had made a "flip flap" card and I loved the concept. I watched this tutorial and decided to adapt the concept to fit as a topper on my standard 5 1/2" square cards. I cut down the number of flaps from 3 to 2 to make it work. I then drafted the pattern in my silhouette cameo to make life easier for me ;)

I always loved paper dress up dolls as a kid, so thought Lula Fairy Doll would be a great image to use. The card front became her "bedroom" and the flaps the doors to her wardrobe. Inside the wardrobe, hanging up ready to wear for that special day, are some of the clothes from Lula Christmas Elf (clothes only) 


The papers I used are digital papers from Mo Manning - on the front is Colorful Trees and on the back is Silver Blue Ornaments. I have sized these to work as I wanted them to on my project. 

Other clothing options available for Lula are Lula Butterfly and Lula Angel Wings

Most of the dies I used are from La-La Land Crafts

I hope you enjoyed my fun little project.

Saturday, October 1, 2022

Kissing Frogs by Mo Manning


Something a little different from me - a little more pastel! This is the uber cute Kissing Frogs by Mo Manning and I just felt the soft pinks and muted greens suited her more than my usual bold colour palette. I tied her in with some foil embossed designer paper for added fantasy.

I hope you find her as magical as I do.

Saturday, September 17, 2022

Little Bear by Mo Manning


I have always loved teddy bears and colouring them up. They are open to using so many different texture techniques which can create such different looks for the same image. Today I decided to colour "Little Bear" up looking fluffy, perfect for a young child to snuggle up to on their 1st birthday - if only he could jump of the page for that hug!

Saturday, September 3, 2022

Little Fairy Mandi by Mo Manning


It's Spring here in Australia so the trees and flowers are bursting into life and Little Fairy Mandi is enjoying time in the garden :) I've coloured her with Copics and there are touches of fairy dust (aka glitter) throughout the card to add a magical feel.

All the dies used on this card are from La-La Land Crafts

Saturday, August 20, 2022

Collette and Kitten by Mo Manning


When I spotted Collette and Kitten in Mo's store I just knew I wanted to colour her up - she's adorable! I coloured her up using Copics and paired here with a stunning 3D sunflower using the  Lovely Layers Sunflower Die by Honey Bee Stamps.

Until Next Time...

Monday, August 15, 2022

George's Walnut Car by Twistoon


Isn't this little guy the cutest??? The image is called "George's Walnut Car" and he's another is the amazing range of gnome images from Twistoon Digi Stamps. If you're a gnome lover and haven't checked them out yet you really should. There is one for almost any occasion, or even for just a bit of fun!

I thought he would be perfect for a belated birthday card and I hope you agree. I created the sentiment on my computer to fit.

Saturday, August 13, 2022

Teacher Chibis from Twistoon


Working at a school meant these gorgeous teacher images from Twistoon Digi Stamps were must haves for me, especially the male teacher as you don't find those as often. I paired them with a couple of teacher "classics" - a chalkboard sentiment and an apple ;)

Click on the links to find them instore - male or female

Until next time....

Saturday, August 6, 2022

Mason Jar Tissue Dispenser Tutorial


Recently I saw some really cute mason jar tissue dispensers and I figured I could do something similar and include a cute digi image onto the project, so I went hunting for a jar. This was the part I thought would be easy! But most of the handle less jars have images and words embossed onto the surface of the glass which wouldn't suit my project - so I ended up with a mason jar glass with a handle. I've put together a few steps for you if you'd like to give it a go yourself :) I used Mo Manning's "Needs Mummy" image.


You'll Need                                                            
- a mason jar with 2 part lid (something else I couldn't find so I ended up 3D printing one!)            
- sheet of white foam                                             
- 2 coloured images on thin paper (I used copy paper)
- all purpose sealer
- glue
- white acrylic paint
- ribbon
- stazon ink pad
- texture stamp
- gloss varnish


Since I wanted my images to wrap around the glass slightly and not have a high profile, I decided to print them onto copy paper and colour. I used my copic markers but you have to have a lighter touch on copy paper to prevent the ink bleeding too much. I wanted an image on both the front and the back of the glass so I coloured up 2.

I then sealed my images with an all purpose sealer on both the front and the back, allowing to dry in between. I have skipped this step in the past but the images became transparent when I varnished them and the background pattern showed through! Cut out your sealed and dried images.


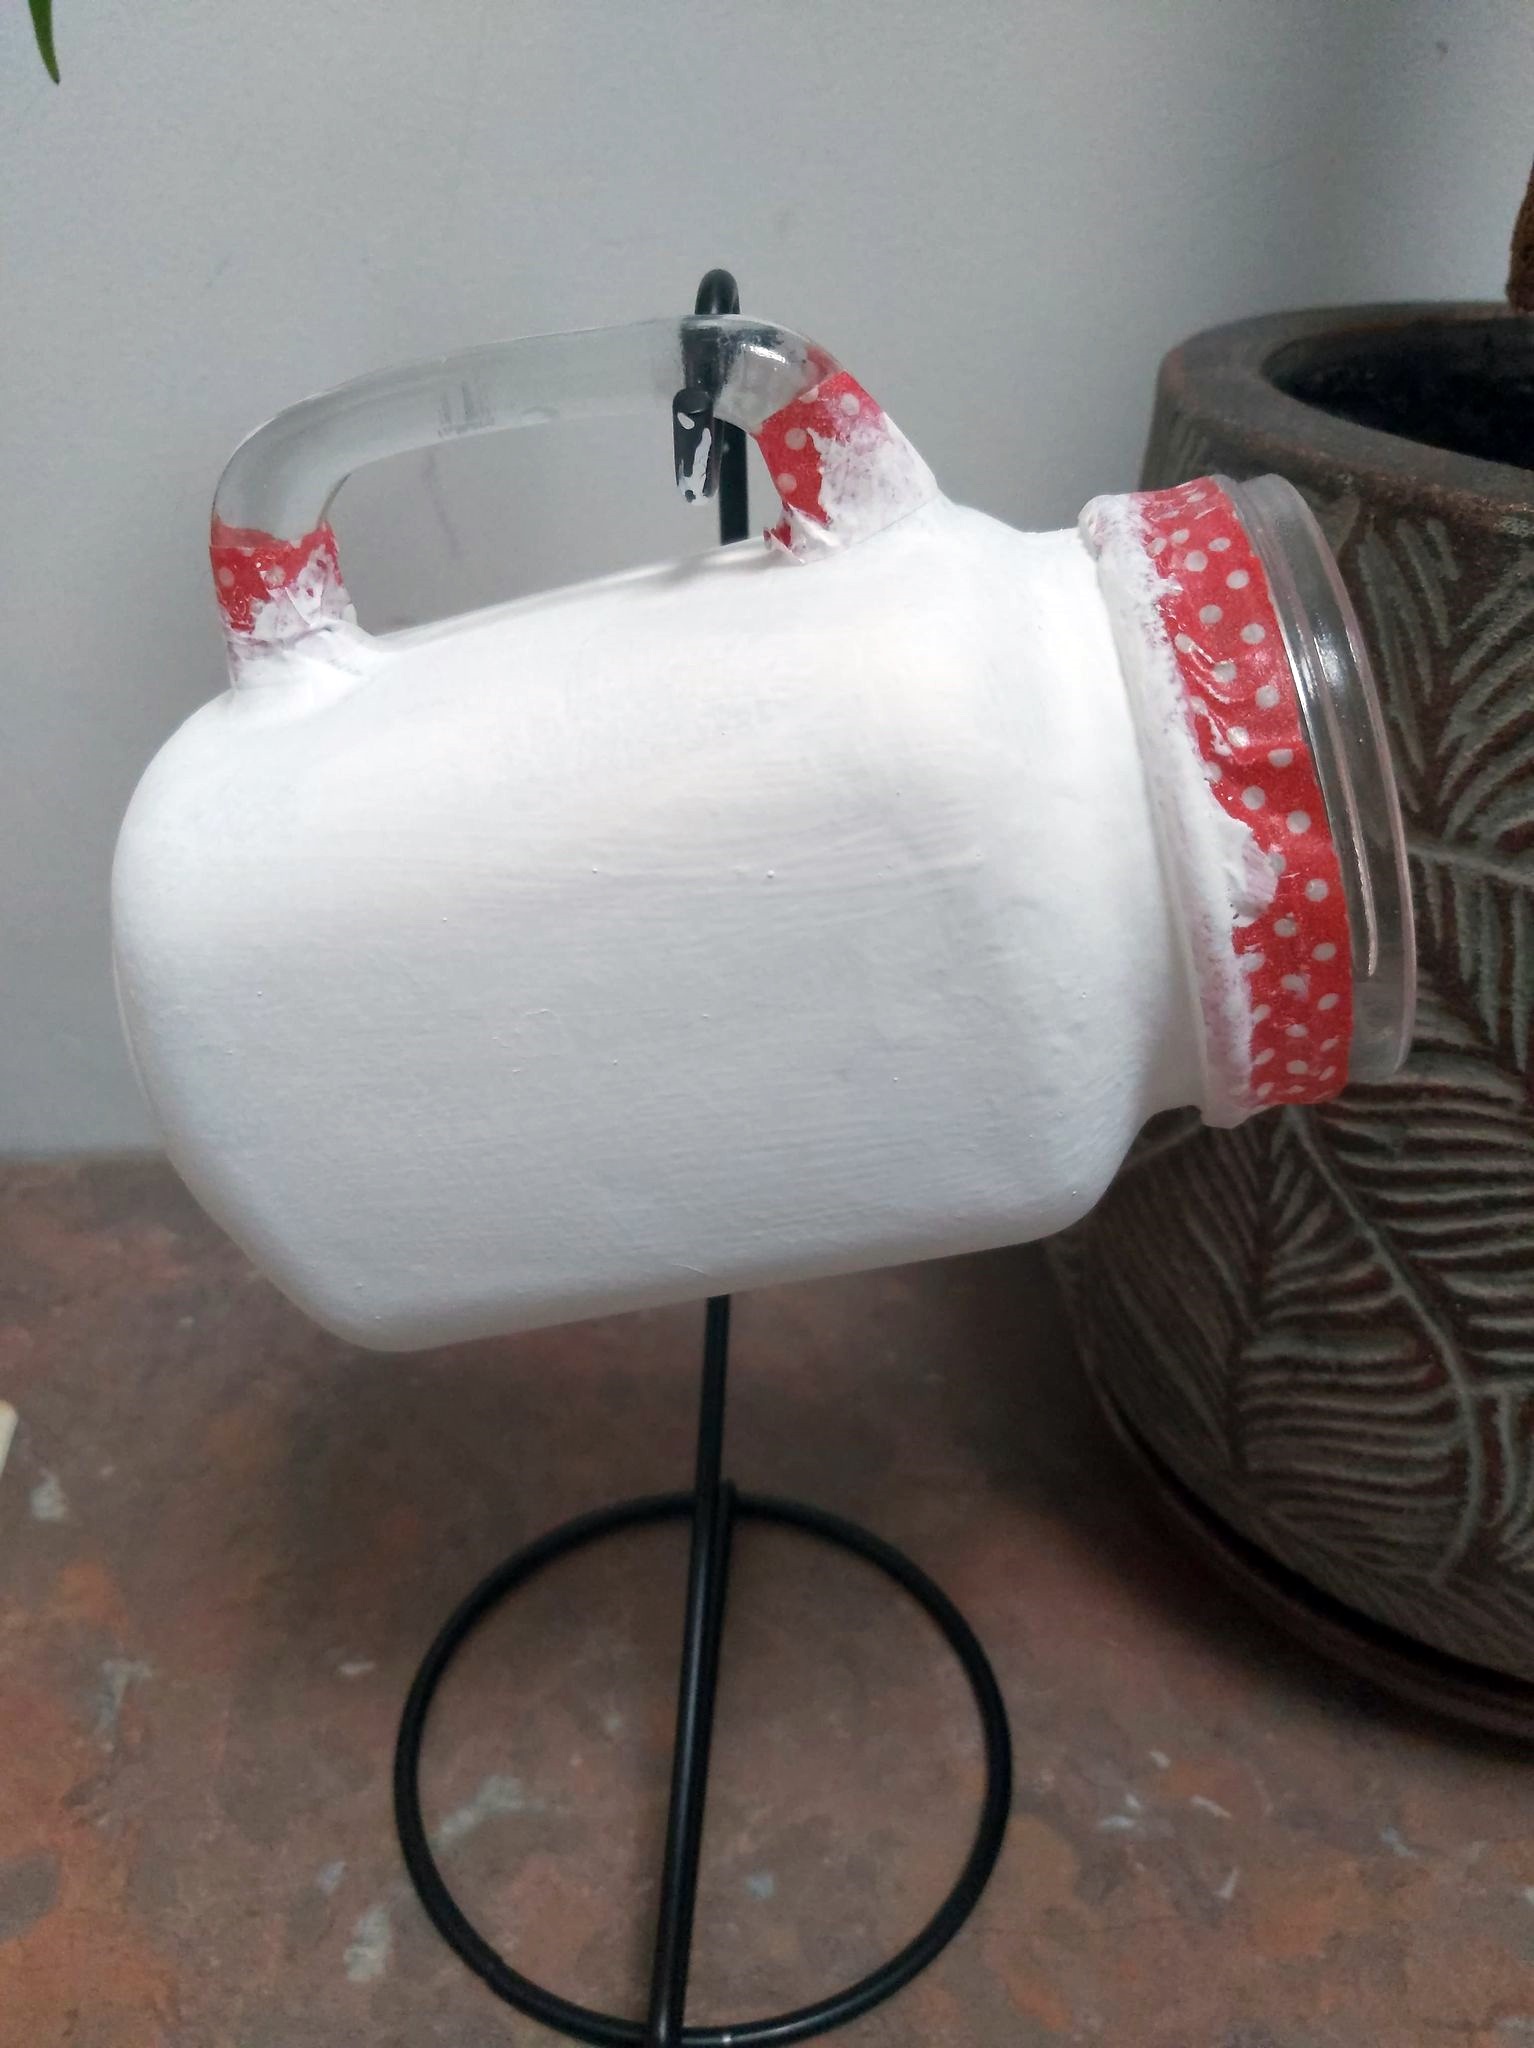
Tape off the rim and handle of your jar before sealing and painting. I sponge my first coat of paint on the give it some grip for the subsequent coats. Carefully remove the tape and stamp on a pattern using stazon ink if you wish.


Glue your images onto the front and back of your jar - making sure they don't lift. Once dry add several coats of clear varnish.


Once I cleaned up my printed lid I cut a circle of white foam to fit inside it. Before gluing it in place cut a cross in the foam to allow the tissues to come out while providing a dust cover for the rest - see image above.

Decorate the rim of the jar before loading with tissues and attaching the lid.

I used this YouTube video tutorial to load the tissues into my jar.

I hope you enjoyed this and....

Bless you ;)

Tuesday, July 26, 2022

Nose in Book from Twistoon


I coloured this cutie up a while ago and decided it was time she made it onto a card. This is "Nose in Book" and you can also get a boy version if you prefer. 

I created the red scrunched flowers to tie in with her glasses and laces.

I think it's time to do a bit of reading myself now....

Until Next Time
Happy Crafting