Pages

Wednesday, August 31, 2011

The Craft's Meow Preview - Fun{tashe}tic


Today we are previewing something a little different for you from Nina B Designs for The Craft's Meow - Moustaches! Such a fun set for those guys in your lives - isn't it great to have some funky images for them! There are several fun sentiments to go along with the "mos" and I've used them to create a fun DP for my card.

You can check out all the fun of preview day over at OUR BLOG and have a chance to win this set for youself. And remember to pop on back tomorrow for our release day blog hop where you'll see ALL the sets revealed in their entirety and have a chance to win.

Tuesday, August 30, 2011

The Craft's Meow Preview - Happy H'owl'oween


Woohoo - or should I say woot woot. It's preview time for The Craft's Meow. Unfortunately I missed out on last month's fun but have had a blast playing with 2 new sets this month. This one is called Happy H'owl'oween and was designed by the talented Jenny Suchin from Wee Memories. Jenny had 2 fabulous owl sets released last month too so be sure to check them out if you think this guy's a hoot.

You can check out all the fun from this set and see a sneak peek from tomorrow's set over on our blog HERE. Release day is September 1st (PST) which is the first day of Spring here in Australia - a double reason the celebrate!

xXx

Monday, August 29, 2011

These Two Reminded Me of My Kids


When I first saw these siblings from Mo Manning they reminded me of my own kids. I have an older girl who is very protective of her little brother (even though at 13 he's now nearly as tall as she is - LOL). I told my daughter why I loved these so much and her first reaction was "my hair isn't that boofy" - but she never denied her affection for her brother. The reason I've done these 2 blonde is because my kids are blonde too - they have their Dutch grandmother to thank for that. Oh the fond memories these bring back of years past!

These 2 are Helena and Henry - or there's Andrea and Raul if you'd prefer. And don't forget Mo's DT have their own blog HERE for regular inspiration.

Copics used - skintones R20, R11, E08, E00, E000 - plus ciaos in picture Y00, C1, B95, B93, R29, R22, E51
xXx

Sunday, August 28, 2011

Magnolia Down Under Challenge #111


Welcome to another fabulous challenge over at Magnolia Down Under Challenges - this week we are asking you to use TEXTURE on your creations. Now why I would decided to stamp and 3D these trees 24 hours before the post went up is beyond me but it certainly creates the look I was after. Adding to the texture I've used some stickles and flower soft along the branch edges. I used an embossed frame background for more texture - along with some 3D snowflakes, pearls and lace. The sentiment and my mini Tilda are popped up too.

As I was so late in getting my card into the MDUC blog I got to have a sneak peek at the rest of the DTs AMAZING inspiration for this challenge. Do yourself a favour and pop on over to our blog too before heading into your own craftroom to play along!

Copics - Skintones R11, R20, E08, E00, E000 and ciaos in the picture - YG67, R29, R27, R22
xXx

Saturday, August 27, 2011

Make It Colourful - Sunsets with Clouds


Boy oh boy when I told Zoe I loved a challenge I didn't realise how seriously she'd take me - LOL. This week at Make it Colourful we have been challenged to colour a sunset with clouds. Now I can honestly say this wasn't my first attempt - I took great delight in tearing that one to shreds - LOL. I was still not overly happy with this but after a couple days break it's not too bad! I think a bit of space can often be good when judging your own work.

I've come up with a fairly romantic sunset scene combining this cute image from this week's sponsor Tiddly Inks with a Make it Crafty background - I did erase one of the birds in the background though as it looked like it was flying out of the poor girls head - LOL. I coloured the archway and ivy in black and used black lace to indicate silhouettes as these often appear in the foreground of sunsets.

Now I must say I'm REALLY glad I gave this a go and I hope you try too - the only way to grow is to get out of your comfort zone. The other gals from the MiC DT have come up with more fantastic inspiration for you too - check it out on our blog HERE.

Images -
MiC Stairway to Heaven
Tiddly Inks - You and Me

MiC Lasercut chipboard - Love Hearts Swirls sentiment

Copics as pictured plus skintones - R11, R20, E08, E00, E000

Ciaos in picture - R29, R27, R22, R20, R00, C3, C1, YR16, YR04, YR02, Y06, B00, W5, W3, W1

xXx

Wednesday, August 24, 2011

And Now For Something a Bit Different


Having been a lab tech for most of my working life I have a real appreciation for science and the way experiments can make you think. Recently I was helping out at my old workplace and came across an article about resin casting - and this was followed up with an email discussion with Mo Manning about me trying to cast some of her gorgeous Christmas images into resin like the bugs and "other things" that are lying around the lab.
I chose Mo's adorable Christmas elves - Lil Elf Pipa and Lil Elf Mim to create some resin ornaments for my Christmas tree. I found the casting resin at my local hardware store - and you need to get some catalyst too. And here's a word of warning - this stuff may look great but it's pretty smelly and ate through the 3 layers of plastic cup we mixed it in - so TAKE CARE!!! Before cutting my images out I backed them with some Christmas DP to hide the ink splotches on the back. You also need to seal your images with a couple of coats of matt mod podge on both sides before casting. I added some star dust stickles to the elves after sealing for some Christmas bling!


For a mould I found some oversized silicon muffin pans - you can see the ridges on the side from the pans so be aware of the patterns if you're looking for moulds. I also had to get my moulds before printing off my images so I'd know how big I could make them! Luckily I placed my images face up as the silicon had a slight texture to the surface making the end result look like frosted glass. I also have a couple of fingerprints in the surface of one thanx to he who shall remain nameless touching one too early. They take a good 48hours plus to dry! And DON'T cast on a rainy or humid day as your resin may end up cloudy! I also think I could have made these a bit thinner but it looked like the images were floating up to the surface and we wanted them embedded - in fact we did push them down with a stick a couple of times - live and learn!

Once done I simply hot glued on some gold cord, a bow and a little flower (to cover the glue) and there you go - 2 glass like Mo Manning original Christmas ornaments! FYI this are about 3"(7.5cm) in diameter across the top.


Copics used as pictured plus skintones E08, E00, E000, R20, R11. Ciaos in picture are YR23, R37, R35, R32
xXx

Monday, August 22, 2011

New Release from Emerald Faeries


Today is release day for 2 gorgeous new Emerald Faeries - This first one is the adorable Isabella. I've always loved pink and green together and I thought it would be a fabulous colour combo for Isabella.


And now I'd like to introduce you to the sweetest baby around - meet Ashee. He reminds me of the baby photos taken by one of my all time favourite baby photographers - Anne Geddes.

Both of these cuties are now available for sale at...

And don't forget to pop over to our blog HERE and check out what the rest if the Emerald Faerie Garden gals have come up with using these fabulous new faeries.

Copic colours for these images - both use skintones E08, E00, E00, R11, R20. The photo on the right is for Isabella.
These ones are for Ashee - the ciaos pictured are R37, R35, R32, B95, B93
xXx

Saturday, August 20, 2011

Make It Colourful - Colouring Grounds


This week at Make it Colourful we are grounding are images. This can be a simple dash of colour under our images to stop them "floating" around or a specific image depicting ground like a pathway or some grass. I deliberately removed the lines from the "By the Window" image so that the only "ground" was what I coloured in. I also added some light shadow around the images to further connect them. My favourite thing to do when I ground images is to use a mix if colours in the E40 to 43 range to dash in some colour without blending too much. Try to use the darker shades where shadows would be cast and move out to the lighter tones.

Images from Make It Crafty - By the Window and the gentleman from Flirty Seniors
Lasercut chipboard from Make It Crafty - MIC Swirly corners

Copics as pictured plus skintones - E08, E00, E000, R11

Ciaos are E35, E33, E31, G99, G83

xXx

Tickled Pink Stamps is Sponsoring Cupcake Craft and Card Makin' Mamas this week.


This week Tickled Pink Stamps is sponsoring 2 different challenges - Cupcake Craft who have a fabulous sketch to play along with, and Card Makin' Mamas are asking us to be "Pretty in Pink". There are TPS prizes up for grabs so we hope you can play along too. I've combined both of these challenges in my card and have used Lil Fashionette 20s Evie.

Copics colours not labelled -                                                                                   Skintones R20, R11, E08, E00, E00                     Ciao's in photo - E51, E57, B00
xXx

Thursday, August 18, 2011

Mo's Dream Team Blog Hop


Yup it's that time of the month again when Mo's Dream Team get together for some fun - it's our team blog hop! This month I am your lucky host and I've chosen Pearls and Lace for the gals to use on their cards.

Anyhow - as host I am your first stop on the hop - so let's get going - oh and just to let you know that we are giving away 2 spot prizes for those that comment.

I have used Mo's gorgeous Snow White for my card - I am soo looking forward to putting together a fairytale scene with this beauty and the gorgeous dwarves Mo is drawing up for us - you can check out the ones she's already come up with HERE in the Snow White Collection.

Don't forget there are new creations posted regularly to inspire from the DT on our blog HERE.

Now it's time to hop on over to the always amazing Mina's Blog.


If you get lost along the way here's the hop order for you - just click on the blog links on my left sidebar under Mo's logo... Debbie {me}, Mina, Jak, Lori, Kerttu, Jane, Julie, Heidy, Alice

Copic colours not labelled - Skintones R20, R11, E08, E00, E000
Others R37, R35, R32, Y02, Y00, E33, E31, C1

xXx

Tuesday, August 16, 2011

Fundraising for Lyndall


My dear friend Cheryl has one of the biggest hearts I know - she is calling for help for a fellow crafter in need. This ability to help others through our blogs is one of the things I love the most about blogland and the people here. You can read Lyndall's story HERE on Cheryl's blog and learn more about how we can all get behind Lyndall. Not only are there gorgeous digis for sale in a specially created store HERE - with all proceeds going to Lyndall and her family to help with her battle, but there's also a benefit night being arranged.

My card has been made using one of the digis available - this one is called Model and this image and some fabulous sentiments like the one I used were kindly donated by Bizzy Becs.

If you can't make the benefit night there are so many ways you can be a part of this. You can send Lyndall a card of support, buy some of the gorgeous digis available or donate something for the benefit. I have finally found a use for this single bed quilt I began some time ago and never quite got finished. I am in the middle of binding it and it will be part of the donations for the benefit.

I hope to inspire some of you to help out too - big or small every little bit helps!


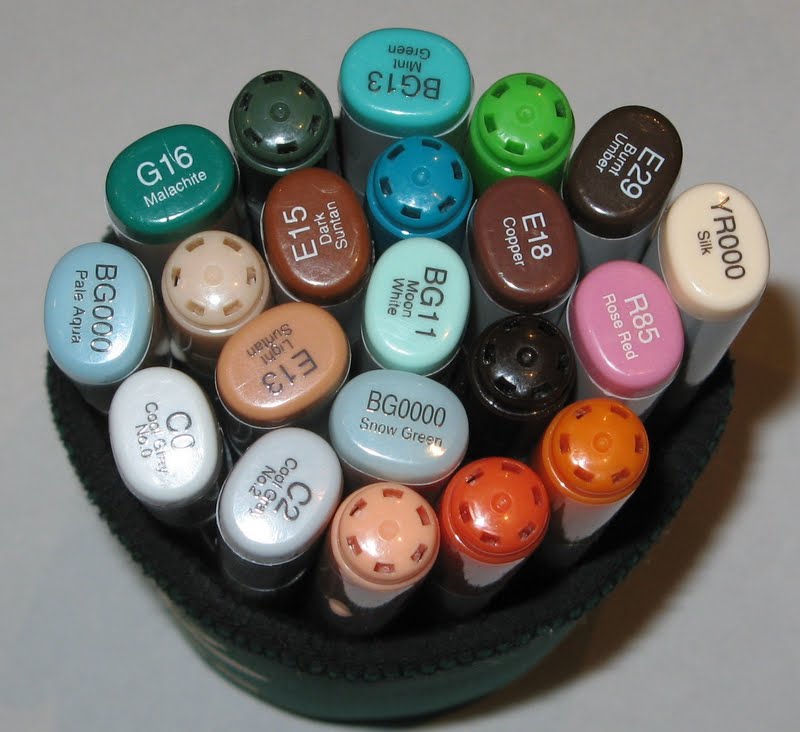
Extra copics used....Skintones - R20, R11, E08, E00, E000
Ciaos on picture - R37, R35, R32, E51.
And the reason my Y000 has a number blacked out - I bought a second Y0000 pen by mistake and a Y000 refill - so when my lighter ink ran out I topped it up with the darker ink and changed the code on the pen!

xXx

Monday, August 15, 2011

Tickled Pink Stamps Spinks and Spooks Release Day


So what did you think of the Spinks and Spooks collection??I loved it and felt there was something for everyone! Some ghoulishly quirky ones right through to the utterly cute ones. And today is the day they are IN STORE!!! And if you've missed checking out the EIGHT amazing new images and INCREDIBLE sentiment set pop on over to our blog where the DT have come up with some truly inspiring creations. 

For my release day card I've used Lil Haunt 2 Wizard Eric and more of Ann's gorgeous sentiments. Not only is Eric one of my fave Lil Lads but being the Harry Potter tragic I am I couldn't go past using him for my card - LOL.

Not only is it release day for these fabulous NEW images but it's also DIGI WEEK over at Tickled Pink Stamps - so you can grab ALL your favourite digis HERE

xXx

Sunday, August 14, 2011

Urban Scenes Blog Hop with Make it Crafty and Whimsy Stamps


Whimsy Stamps & Make it Crafty have come together to create a fun Urban Themed digi collection!

Ann Vento has whipped up her magic and designed an incredible collection of
funky wall sayings, city landscapes and of course a range of super cool street signs.

Make it Crafty is trying something new offering all the different elements for you to build your own urban backdrop.

Then of course, what better characters to incorporate into such a scene than the fabulous KennyK rubber stamps available from Whimsy Stamps!


Our incredibly talented Design Teams have had a blast playing with all the different elements to bring you LOTS of inspiration!

We have broken it in to TWO HOPS
HOP A Starts Here & HOP B Starts HERE!

There will be a winner for EACH HOP and if you hop your way through BOTH, you’ll go in the draw for the GRAND PRIZE TOO!

HOP A & B Winners will each receive a $15 voucher from both Whimsy Stamps and Make it Crafty

GRAND WINNER will win our full Urban Digital Collection
4 Digi Sentiment sets by Ann Vento & the Urban Elements Collection from Make it Crafty
  
You are currently on HOP B and should have arrived from Cheryl's Blog  


For my scene I have merged FIVE different Make it Crafty images to create my backdrop. For my sentiment I used two Whimsy Stamps Party Time street signs and then I popped Kenny K's Troublemaker onto the scene. I have used a fabulous tutorial by Mariska to make my Kenny K image into a 3D image - she's made up of 5 different layers and it adds an amazing depth IRL.


Your next stop on HOP B is Pattie's Blog, but before you go make sure you leave a comment below!

You have until August 21st 8PM Australian QLD time to make your way through the hops!

Be there... or be square! J

xXx

Sentiment Release from Emerald Faeries

PLEASE SCROLL DOWN FOR MY MAGNOLIA
 DOWN UNDER CARD


Today in The Emerald faerie Garden we are showcasing our gorgeous new sentiment set -  The Faerie Drop Sentiments.


These gorgeous Sentiment Stamps have been designed by one of our own Emerald Faeries Garden Design Team ladies -  Anita Marie
- and are now for sale at THE EMERALD FAERIES ONLINE STORE. 

I've mixed a few of the elements together and then hung one of the cheeky Larakins off of it. I also added a bit of colour to make it pop. I then used Kayla and Twinkie to complete my baby card.

I know the rest of the EFG DT have made gorgeous creations using these sentiments too so be sure to check them out - you can find all the links AND check out how you can  win these for yourself on our challenge blog HERE.

Oops - nearly forgot the copic colours and this time I DID make a note - see I am trying - LOL. You can click on the picture to see the numbers better. The Ciaos that are there are... YR07, YR04, YR02, YR00, E49, G85, G14, BG49. And I used my usual skintones - E08, E00, E000, R11, R20

xXx

Magnolia Down Under Challenge #109


This week over at Magnolia Down Under Challenges we have a really fun challenge for you - create something inspired by a song! I've seen some of the inspiration privided by the MDUC DT and boy have they had me humming along to songs from my past...and created gorgeous scenes to delight the eyes! Pop on over to our blog and check them out!

This week we have a fabulous new regular sponsor - Stampy Land - who are offering our winner a $20 gift certificate - so brush off your favourite song lyrics and come along and play!
My scene is inspired by the song Moonlight Over Paris by Vanessa Williams - and if you click on the name of the song you can check out a youtube video of it - I was going to try and be all technical and insert it here but that is waaaayyyyy beyond my computer skills and hubby is away so I can't ask him to help! And then when I told my daughter the song I based this on all she said was "WHO??" - I feel soo old - LOL. But at least she knows Vanessa Williams as an actress from Ugly Betty even if she didn't know she could sing!

I've masked the Magnolia Moon and Eiffel Tower stamps together and popped them on a background stamped with my Stampin' Up En Francais stamp. I added Tilda and made some rolled roses with the scraps from the En Francais background. A black border using my Magnolia heart border die and I think I've created a reasonable Parisienne feel - just need the crepe makers on the corner and a bottle of French wine - BLISS!

xXx

Saturday, August 13, 2011

Make It Colourful - Colour and Object That Looks Wet


This week at Make it Colourful we have a VERY interesting challenge for you. JUST using colouring give your images a "wet" look. There has been some interesting chatter amongst the group but the resulting inspiration from the DT has been amazing! I even asked my FIL who has been painting for 50 years for some tips and he came up empty - LOL.


This week we are being sponsored by the always amazing Mo Manning.

I've merged Mo's  Waiting for Rain (but I did remove her little boat from her hand as it didn't quite suit my background) with Make It Crafty's Cobblestone Path.  I added dashes of pale blue to indicate rain and made the "dirt" dark like it is when it gets wet. I also added a light colour to the top of the cobblestones to make it appear as if the sky was reflecting off the surface of the wet rocks. Having an image in a rain coat and gumboots adds to the wet day impression - I HOPE - LOL.

The raindrops on her coat were a last minute addition after seeing my fellow teamie Barbara's amazing job with her image and getting some tips from her. I've added some white gel pen "rain" and shadowed them with my deeper yellows. It makes such a difference to the feel of the image!

Now I HAVE been asked to include my copic colours but this was coloured up before that request so here are the colours as best as I can remember them!

Skintones - R11, R20, E11, E01, E000
Raincoat - Y000, Y00, Y02, Y08, Y19, YR23
Rocks - W5, W3, B00, B0000

xXx

Thursday, August 11, 2011

Tickled Pink Stamps Spinks and Spooks Preview Day 5


Well it's Day 5 of the Tickled Pink Stamps Spinks and Spooks previews and I hope you're loving them just as much as I am! All 8 Halloween images will be available instore on Monday the 15th of August along with Ann's amazing sentiment set - so make sure you don't miss out!

Today we Have Lil Haunt 2 Mummie Christina - she's a fun lovin' gal even if she IS all wrapped up in herself - LOL. I've paired her with a digi stamp coffin from Just Inklined - I had some fun with this by printed it onto 2 different shades of card, detailing and then scoring so the coffin lid could be raised up for me to pop some flowers underneath. The DP is from the Martha Stewart paper pad I bought home from The States last September.

Don't forget to stop by the Tickled Pink Stamps blog for more amazing previews and to comment for a chance to win some Halloween rubbery treats for yourself.

xXx

Tuesday, August 9, 2011

A Little Bit of Fun


A few weeks ago the gals from the Make It Colourful DT had a bit of behind the scenes fun. We challenged ourselves to try out a skintone technique we nick-named "green face". It was based on THIS amazing tutorial by Trev Murphy where he lays a base of green down underneath his skintones. I went part way through the line-up of colours used and then thought he was going too dark for my Tinkerbell so I just used other lighter tones to finish. I wasn't sure how this would turn out so I didn't take a note of the colours - sorry - but why not give it a go yourselve and have some fun with it!

This is the image I coloured up to play along with and over the weekend at Stamp Camp I got a chance to pop her on a card. This Tinkerbell with 'tude was actually a colouring page I found while searching the internet - you can see the lines are a little pixelated from when I enlarged her but I quite like the softer lines. The texture on her wings is "fairy dust" LOL.

We all found the green base added a warmth and depth to the skintones and I have used it a couple of times since. Hope you try it out too...

xXx

Monday, August 8, 2011

A VERY Special Cause

My amazing friend and Boss Lady Kellie from Tickled Pink Stamps is going to chop her hair off for a cause - and boy has she got a LOT of hair. The cause is the Princess Charlotte Alopecia Foundation and you can read Kellie's story and see photos on her blog HERE - and her gorgeous 5yo daughter Heidi wants to follow in her mum's footsteps - you go girls!


I thought this was such an incredible thing to do and then I saw THIS post about one very special little guy who suffers from Alopecia and his mum is a fellow crafter. With Kellie getting the "chop" and little Kade being my new hero I just wanted to spread the word and hopefully help raise some money for a fabulous cause that helps people feel beautiful inside and out!

xXx

Sunday, August 7, 2011

Tickled Pink Stamps is Sponsoring Paper Sundaes Challenge


This week Tickled Pink Stamps is sponsoring Paper Sundaes Challenges where they have a fabulous sketch for you to play with. I've used the gorgeous Lil Little Lolita Willow on my card and some gorgeous Graphic 45 paper. We hope you can come along and play for a chance to win some fabulous TPS prizes.
xXx

Tickled Pink Stamps Preview Day 1


With Halloween fast approaching it's time for Tickled Pink Stamps to introduce you to the new Spinks and Spooks collection - a collection of 8 gorgeous images from the Lil Lolita, Lil Lad and Lil Pinkette ranges. AND we also have an AMAZING sentiment set designed by the always amazing Ann Vento. Not only are the sentiments creepily fantastic but they also match the Tickled Pink Stamps Christmas die (available HERE) - woohooo.

Today is day one of previews and we have Lil Haunt 2 Zombie Kellita to show you. She does remind me a little bit of Kellie in the morning after a loooooong night of crafting - only joking - LOL. 

Don't forget to stop by the Tickled Pink Stamps blog to check out what the rest of the gals have done with Zombie Kellita - and leave a comment for your chance to win her for yourself. You'll also want to pop in there each day for more amazing previews...

xXx

Saturday, August 6, 2011

Make It Colourful - Pink


This week at Make it Colourful we have an easy challenge for you - PINK! We also have a wonderful sponsor in Bunny Zoe Crafts and they are offering our winner a £10 gift certificate.
My poor blog will be left alone this weekend as I'm off to Stamp Camp so I hope all my posts pop up as scheduled - especially as this weekend it's going to be busy busy busy here - LOL. I hope you are all having a FABULOUS weekend too...

Colours - RV00, RV10, RV55, RV63, RV66, RV69

Image- Snow Goddess by Michelle Perkett available at Bunny Zoe HERE.

Lasercut chipboard - MiC Filigree Borders from HERE.

xXx

Friday, August 5, 2011

Tickled Pink Stamps is sponsoring 3 Challenges this week


This week Tickled Pink Stamps is proud to be sponsoring Bearly Mine Challenges (Charm the Spots off), Card Makin' Mamas (Birthday) and The Deconstructed Sketch (Sketch) - woohooo! And what's even more fun is we can mix these all up into one fabulous card if we like which is exactly what I've done. I've used the fabulous Lil Little Lolita Kellita for my card along with some Basic Grey DP.
Check out the Tickled Pink Stamps blog for more fabulous inspiration too.
xXx

Wednesday, August 3, 2011

I Saw Mommy Kissing Santa Claus


Well it's August already - so that means I really need to make a start on some Christmas cards. When I saw these 2 images from Mo Manning I thought they would look pretty cute together and started me singing the song from the title of this post - but only in my head - LOL. 
These 2 cuties are Little Present (the "mum") and Santa's Hat girl (the child). I found the song's lyrics and printed some of them out for my sentiment and used this week's sketch from Sketch Saturday, twisting it 90 degrees. 

xXx