Pages

Sunday, April 29, 2012

Tickled Pink Stamps is Sponsoring The Corrosive Challenge AND Crafting When We Can


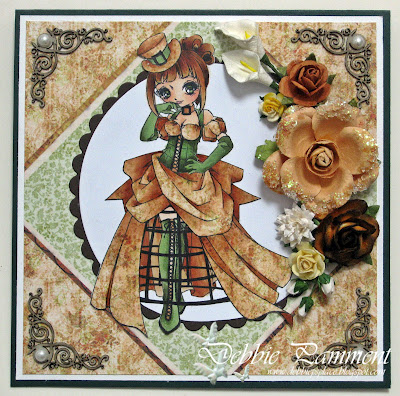
This week Tickled Pink Stamps is sponsoring TWO challenges - The Corrosive Challenge where the theme is "The man, the myth, the legend - Tim Holtz" (use at least one TH product on your creation) and Crafting When We Can where they have a fabulous sketch for us to play along with. I used Lil Pinkette Christmas August on my card and combined both challenges. We hope you pop along to these challenges to join in the fun and have a chance to win a some Tickled Pink images...

Copics used - Skintones (R20, R11, E11, E00, E000) plus E44, E43, E42, E41, E40, R39, R29, R25, R24, R22, B00, B0000, T2, T0 
Thursday, April 26, 2012

Mo's Adorable New Baby Fairies


As you may or may not know I'm a bit of a sucker for fairies - there's just something so magical about them and they can't help but make your day just that little bit brighter. 

When Mo Manning released her set of  "3 Baby Fairies" they were on my "must have" list within seconds of seeing them - and the timing could not have been more perfect. I've been in a bit of a crafting slump lately but these cuties had me itching to pull out my copics and get colouring and glittering! I LOVE the little extra "buggies" that come with them too. I chose some gorgeous Prima DP to start creating my Summer garden on a card - full of colour and fun.
Copics used - Skintones (R20, R11, E13, E11, E00, E000) plus R29, R24, YR31, YR30, YR27, B16, B02, B000, B0000, YG01, YG0000, W5, C2, C00

Sunday, April 22, 2012

Magnolia Down Under Challenge #143


This week at Magnolia Down Under Challenges we are asking you to make "anything BUT a card". This seemed like the perfect opportunity to delve into my box of "kits" and make something up - I chose this little ATC cabinet that I bought at the recent Paperific Show - it's the perfect size to showcase mini world Magnolias. 

To give my scene some depth I used some silicon to bring the birdcage and the fence forward a little. I created a foldover tab at the bottom of Edwin and Tilda and used that to glue them to the base of the cabinet. To create the "windows" for the doors and side I stamped my SU En Francais background stamp onto some acetate using black stayz on ink - be careful if you try this as the stamp can slip easily across the slick surface.
And don't forget to pop on over to the MDUC BLOG to check out the rest of the amazing projects by the DT.


Raw ATC cabinet kit from Twiddlybitz
Lasercut chipboard from Make it Crafty (Dragonflies), Scrapmatts (Birdcage and bird) and Scrapware (Fence)
DP is from Meg's Garden and is designed by my fabulous Teamie Denise

Copics used - Skintones (R20, R11, E11, E00, E000) plus RV63, RV55, RV10, RV000, B95, B93, B21, T2, T0, E44, E43, E42, E41, E40

Thursday, April 19, 2012

Mo's Dream Team Blog Hop


It's time for another fun blog hop with Mo's Dream Team and this month our wonderful Hostess is Heidy who has challenged us all to make a shaker card. The fun all starts over at Heidy's. I haven't made too many of these and am still on a steep learning curve - but I think I managed to "hide" all of my little mistakes - LOL . 

For my card I decided to celebrate the colder weather here Downunder as we head toward Winter - and the gorgeous Winter Fairy Talva was the perfect fit. I used some liquid pearls on my image so it would still be "snowing" even when the shaker bits had settled.


I used a mixture of seed beads and glitter inside my shaker - they add a fabulous texture together and the heavier beads help to stop the glitter from sticking. The same seed beads are at the centre of each of the small snowflakes around the frame and I repeated the glitter on the largest of the snowflakes in the spellbinders "stack". The gorgeous DP is by Prima.

And now it's time to head on over to Mina's marvellous blog - where I'm sure she's mastered the shaker card to perfection!

Copics used - Skintones (R20, R11, E11, E00, E000) plus YG01, YG0000, RV63, RV10, RV000, YR31, YR30, Y21, B000, B0000

Monday, April 16, 2012

Time For Some Chipboard Fun


For my latest project for Make It Crafty I decided it was time to create something which focused on the laser cut chipboard - it really is too fabulous just to be kept for an embellishment. This is a fairly simple idea that could be adapted to a shop bought frame, a layout or a card.


Here are the base elements of my frame - the cardstock frame was cut using my Cameo and I bought the pattern from the Silhouette store. The triangular wedge piece is a stand for the frame. I later added some chipboard leaves and butterflies into the mix. Since I was making the  chipboard the focus of my frame I inked the butterflies and corners in black to make them pop - the leaves were inked in dark green for contrast.


I tore up pieces of an old dictionary I had bought from the Op Shop (Thrift Store) to cover the frame and give it more interest. I used matt Mod Podge which not only served as an adhesive - but also created a protective layer.


One frame all covered! Next I painted over a thin base of white paint to tone down the pages but still let the look I'd achieved come through.


I propped the butterfly wings up with my tweezers while the glue dried - remember to embellish these before doing this as sticking pearls on afterwards may push the wings out of alignment. Once the wings were dry I added the corner pieces and other embellishments.


As you can see the frame stand holds it up beautifully.

Make It Crafty Chipboard used ...


And don't forget you can check out more inspirational work and tutorial from the rest of the DT on our STORE BLOG.

Thursday, April 12, 2012

It's Raining!


We here in Australia are heading towards Winter - with periods of rains and storms fighting their way through the leftover sunshine from Summer. This little cutie from Mo Manning seems the perfect fit for our weather and my mood - I love our Autumn and the changeable weather - it makes life interesting and there's usually a rainbow in the making somewhere. This is "Singin' in the Rain". Don't you just love her freckly nose, reminds me of mine at the end of Summer - LOL.

The clouds were cut using my Cameo and I sponged some black chalk ink on the lower edges before embossing them for some "fluffy" texutre. 

Copics used - Skintones (R20, R11, E11, E00, E000) plus C2, C0, C00, E35, E33, E31, E08, R59, R27, R24, R22, YR23, Y19, Y08, Y02

Sunday, April 8, 2012

Tickled Pink Stamps is Sponsoring Paper Sundaes Challenges


This week Tickled Pink Stamps is sponsoring Paper Sundaes Challenges and they have their Sundae Bar open with lots of yummy topping to use on your cards. You need to use at least 2 of following "toppings" - kraft, die cut, lace, charms. As always we have some gorgeous inspiration for you from our very own DT to inspire you to play along for a Tickled Pink prize - you can check them out on our BLOG.

I've used Lil Lad Eric from Tickled Pink Stamps and popped him on an urban background I designed using elements from Make It Crafty. The sundae bar toppings I used from the list are kraft, die cuts and a charm.

Copics used - Skintones (E11, E00, E000) plus E44, E43, E42, E40, E18, E15, E13, 100, C6, C2, C00, B97, B93, B21, B05, B000, B0000, Y08, R39, R27, R14

Magnolia Down Under Challenge #141


This week at Magnolia Down Under Challenges we have a sketch for you to play along with. And guess what - silly me made up the wrong sketch and had to re-do it with only little time to spare - phew - one of the reasons I HATE leaving things to the last minute - LOL. You'll get to see my other card in a few weeks time - at least I'll be on the ball for THAT one - LOL.

Check out the sketch and the FABULOUS DT inspiration on our BLOG. And thanx to our Sponsor Scrapyland we have an amazing prize on offer too.

Copics used - Skintones (R20, R11, E11, E00, E000) plus RV63, RV52, RV10, RV000, VO4, V01, V0000, T4, T2, T0, C00, YG67, YG17, YG05, E57, E37, E35, E33, E29

Thursday, April 5, 2012

My Pre-Easter Incentive


Recently I decided it was time to try yet again to beat the battle of the bulge - and the hardest part is getting started and breaking old habits. With Easter coming up I decided to make this card to sit on my dining table near the basket of Easter eggs - to remind me I'll be having to step on those scales afterwards - LOL.

This fun image is by Mo Manning and is called "Hoping". I created the background DP in Microsoft word and just dragged a few of the font versions out and re-sized to make my sentiment. A fairly CAS card for me but  it reminds me of the fresh clean white of the bathroom - where my dreaded scales are lurking.

Copics used - Skintones (R20, R11, E11, E00, E000) plus 100, N3, N1, N0, YG17, YG05, E49, E47, E43, E41, E40, E29, E23, R46, BG0000

Monday, April 2, 2012

My First Post for The Make It Crafty Store DT


Recently our wonderful Make it Crafty Boss Lady Zoe changed things up a bit - splitting the Make it Colourful DT into 2 - one staying with the challenges and the other offering inspiration and tutorials for the Make it Crafty Store Blog. I was asked to be a part of the latter team and I get to kick off the DT tutorials with a tutorial about Paper Piecing with Shading. You can check out my tutorial with all my hints and tips on the MiC store blog HERE. I believe Zoe said I even gave her some new tips - woohoo. In my tutorial you'll see this card come together from it's humble beginnings to the completed project.

Products - 
MiC Digi Stamp - Annabelle
MiC Lasercut Chippies - Swirly Corners
Digi DPs - from Bearly Mine Crafts

Copics used - Black Copic Liner, Skintones (R20, R11, E11, E00, E000) plus R83, G99, G85, G82, Y21, E39, E33, E31, E30, E29

Sunday, April 1, 2012

WINNER of my "Better Late Than Never" Blog Candy


Well in true Debbie P form not only was my blog candy "better late than never" but my winner's announcement is too - LOL. Although I DID say I would post it on March 31st and it may be April Fool's Day here in Australia but I have it on good authority it's STILL March in other parts of the world!!!

Thanx to everyone who left me a comment - there are soo many wonderful things to love on our crafting world and it was fabulous to hear what everyone's favourites were. And those who mentioned family and friends among their favourite things - I'm sure we ALL agree with you on THAT!

And now without further ado I'd like to congratulate my winner........


Here is a reminder of what you'll be getting in the post soon....Isa - all you need to do is email me at rdpam@hotmail.com by Monday 9th April  with your postal address - mark the subject as "blog candy"

If I haven't heard from Isa I'll re-draw on Tuesday 10th of April.