Pages

Friday, September 30, 2011

The Craft's Meow Preview - Fall Fun


It's Day 5 of previews from The Craft's Meow and so it's Day 5 of my recipe cards - the last of the set - I hope you've enjoyed them! This one is based on the set Fall Fun by Jenny Suchin Designs. This is such an adorable set with some really cute characters and fun element pieces - I'm sure you'll agree after checking out the rest of the TCM DT's fabulous inspiration on OUR BLOG.

Come back for tomorrow's RELEASE DAY HOP -  you'll see my whole project completed and get to see all the complete sets over on OUR BLOG.

Here's today's recipe for you....this one is full of nutty goodness so I figured it suited these guys!

Sour Cherry Chocolate Cake
Ingredients
8 egg whites
1 cup caster sugar
250g hazelnuts - dry roasted and ground (I believe these are known as filberts in The USA)
3 Sao biscuits - very finely crushed
720ml jar pitted sour morello cherries - drained
125g butter
1/3 cup caster sugar - extra
125g dark eating chocolate
4 egg yolks
1 tsp vanilla essence

Method           
Line a greased 22cm springform pan with Glad Bake. Whip egg whites until stiff but not dry, gradually add sugar and beat. Gently fold through hazelnuts and Sao biscuits. Spread evenly in tin and bake 180oC / 35 - 40 mins. While cake is baking make chocolate topping. Cream butter and extra sugar until light and fluffy. Melt chocolate and add to butter mixture with egg yolks and vanilla. When cake has finished the baking time, remove from oven and cover surface with the cherries. Spread chocolate topping over. Return to oven for a further 25 - 30mins to set topping.

xXx

Thursday, September 29, 2011

The Craft's Meow Preview - Fruity For You


It's Day 4 of previews from The Craft's Meow and so it's Day 4 of my recipe cards. This one is based on th set Fruity For You by Nina B Designs. I love the stylised pieces in this set with their cute sentiments - it makes them such fun to play with. Be sure to check out the rest of the TCM DT's fabulous inspiration on OUR BLOG.

Here's today's recipe for you....

Pear tarte tatin with brown sugar mascarpone
Ingredients (serves 6)
2 tbs water
155g (3/4 cup) caster sugar
4 large pears, peeled, cored, quartered
1 tbs fresh lemon juice
1 tbs melted butter
1 tsp vanilla essence
1 sheet (25 x 25cm) butter puff pastry
Brown sugar mascarpone
250g mascarpone
2 tbs brown sugar

Method
Place the water and 100g (1/2 cup) of sugar in a 20cm (base measurement) ovenproof non-stick frying pan over medium heat. Cook, stirring, for 5 minutes or until the sugar dissolves. Simmer, without stirring, for 6-7 minutes or until the syrup is light golden. Remove from heat.
Combine the pear, lemon juice, butter, vanilla and remaining sugar in a bowl. Arrange the pear, cut side up and slightly overlapping, in the frying pan. Cook over medium-low heat for 6-7 minutes or until the pear starts to soften. Set aside to cool completely.
Preheat oven to 200ºC. Cut a disc from the pastry, slightly larger than the top of the pan. Place over the pear. Tuck in the edges. Bake for 30 minutes or until the pastry is crisp and golden. Set aside for 10 minutes to cool.
Meanwhile, to make the brown sugar mascarpone, place the mascarpone in a bowl. Add the sugar and stir to create a swirled effect.
Turn the tart onto a serving plate. Serve with brown sugar mascarpone.

xXx

Wednesday, September 28, 2011

GDT For Deep Ocean Challenges and a Friend's Special Birthday


I was very excited to be asked to be Guest DT for Deep Ocean Challenges this week - and doubly happy when Alberto told me the challenge is Birthdays! My BF turned 50 last week so I made this special card for her. The funny thing was I hadn't realised there weren't any 3D flowers on it until I started typing up the post - you all know how much I LURVE flowers - LOL. I think the gorgeous My Mind's Eye DP I used in the background looks like a garden bed full of flowers though!

I've used another Saturated Canary image - this one is Nevaeh and you can find her HERE. There are stickles all around the white edges - you're never too old for a bit of sparkle!

I'm sure there's someone you could make a birthday card for and come along and join in the fun over at Deep Ocean Challenges.

Copics used - E11, E00, E000, R20, R11, BG13, BG11, BG10, BG000, R85, R81, R000, E43, E42, E41, E40, B06, BO5

xXx

The Craft's Meow Preview - Apple Pickin' Time


It's Day 3 of previews from The Craft's Meow and so it's Day 3 of my recipe cards. This one is based on the set Apple Pickin' Time by Maree Truelove. This set brings back fabulous memories of my childhood - wandering through the orchards near my home and sneaking off with an occasional apple - sad to say the orchards are long gone now! Be sure to check out the rest of the TCM DT's fabulous inspiration using this fun set on OUR BLOG.

Here's today's recipe for you....

Apple cake with butterscotch sauce
 Ingredients (serves 8)
200g unsalted butter, softened
2 cups caster sugar
3 cups plain flour
1 1/2 tsp ground cinnamon
2 tsp baking powder
Pinch of ground cloves
1 cup chopped pecans
1 large apple, peeled, cored, chopped
1 tsp vanilla extract
2 tbs brandy
Thick cream, to serve
Apple sauce*
3 large Granny Smith apples -
    peeled, cored and chopped
250ml (1 cup) cider (or water)
1 cinnamon stick
1/2 vanilla bean, split
1 tsp ground ginger
Pinch of cloves
1/2 cup caster sugar
2 tbs lemon juice
 * You can substitute 2 cups bought pie apple.
Butterscotch sauce
200g brown sugar
1/2 cup thick cream
100g unsalted butter
1 tsp vanilla extract

Method
To make the apple sauce, place all the ingredients in a saucepan, cover and cook over low heat for 10-15 minutes until the apple is soft. Beat with a wooden spoon, then set aside to cool. Preheat oven to 180°C. Grease and line the base of a 28cm round spring-form cake pan. Place the butter in the bowl of an electric mixer with the sugar and beat  until pale and light. Sift the dry ingredients into a bowl. Gradually, fold into butter mixture, alternating with 2 cups of apple sauce. Add cloves, pecans, apple, vanilla and brandy and stir. Pour into cake pan and bake for 1 hour. The cake is ready when a skewer inserted into the centre comes out clean, if not cover the top with foil and return to the oven for 10 minutes. Set aside to cool on a wire rack.
To make the butterscotch sauce combine all ingredients in a pan over low heat, stirring until you have a smooth sauce. Spoon over the cooled cake and serve with a dollop of cream.

xXx

Tuesday, September 27, 2011

Make It Crafty Christmas Blog Hop


Yay it's time to celebrate one of my favourite seasons with Make It Crafty - CHRISTMAS. There are some totally gorgeous, fun and unique new images to play with - and Zoe is offering 15% off ALL digi stamps in the Christmas Category until 2nd October.

But before we go on with the hop I'd like to first wish the lovely Zoe 

A VERY HAPPY BIRTHDAY 

and here's a cake to share!


Now we've filled up on yummy cake and are all refreshed it's time to tell you about ANOTHER surprise we have for you....

We contacted one of Zoe's artists (S.H.) who also wanted to participate and drew us this gorgeous party girl for the occasion. Thank you!!

This is "Party Girl Zoe" and isn't she ca-ute! We wanted to make sure everyone was included in our celebration so we're giving away Party Girl Zoe as a freebie to everyone who wants to join in and spread some birthday cheer!! All you need to do is create a new project using a Make it Crafty image or chippies and upload it into the gallery HERE by October 12th. Then email Barbara at ForgottenScraps@gmail.com with a link to your project to claim her!

OK - NOW it's time for the hop - LOL.

You should have started the hop at the Make It Colourful Blog - so hop on back if you haven't as there's lots of blog candies up for grabs along the way! If you ARE already hopping along you should have arrived here from Tracy's Blog where I'm sure there is something amazing to see!


I chose this cheeky duo to play with because they appeal to my wacky sense of humour - this is just the sort of good natured fun that goes on in my house - LOL. I've also been having fun with round cards and thought these guys would suit this quirky shape. Don't forget to check out all the fabulous new images in store at Make It Crafty HERE.

Now onto MY little prize -  included is Simply Sassy 'Retail Therapy' rubber stamp, Magnolia 'Gingerbread Tilda' rubber stamp, Emerald Faeries 'Isla' rubber stamp, Flourish with Bling pearls, Make it Crafty chipboard 'Mix'n'Match Centres'. I'll randomly select the winner from someone who leaves me a comment and will announce it here on Friday October 14th.
Now it's time to send you on your way to the amazing Maria's Blog - where the fun will continue and so will the gorgeous Christmas creations! And make sure you head on over to Zoe's personal blog and wish her a Happy Birthday.

Here's the full hop list if you get lost aloing the way - links are on my sidebar under the Make It Colourful logo...

Make it Colourful, Jane, Jen, Viv, Angela, Annika, Delphine, Elaine, Tracy, Debbie {me}, Maria, Beccy, Carole, Barbara, Zoe

Copics used - E11, E00, E000, R20, R11, E43, E42, E40, E29, E27, E25, E23, BG000, BG0000, C7, C6, C4, C3, G28, G24, G21, YR23, Y35, Y21, Y000, R89, R29, R27, R24, R22

xXx

The Craft's Meow Preview - Happy Fall


It's Day 2 of previews from The Craft's Meow and so it's Day 2 of my recipe cards. This one is based on the set Happy Fall by Maree Truelove. There are so many fun things you can play with in this set as I'm sure you'll agree after checking out the rest of the TCM DT's fabulous inspiration on OUR BLOG.
And here's today's recipe for you....a GREAT one for those turkey leftovers!

Turkey and camembert frittata
Ingredients (serves 4)
500g Desiree potatoes, cut into 2cm cubes
200g Ingham Oven Roasted Turkey Breast Slices (even better with leftover cooked turkey)
200g Camembert or brie cheese, cut into 2cm cubes
1/4 cup finely chopped fresh chives
2 tablespoons olive oil
7 eggs, at room temperature
rocket leaves, to serve
275g jar whole berry cranberry sauce, to serve

Method
Place potatoes into a saucepan and cover with cold water. Bring to the boil over high heat. Reduce heat to medium and simmer for 5 minutes, or until potatoes are just tender. Drain. Set aside to cool in a large bowl .
Shred turkey slices. Add to potatoes with camembert and chives. Toss until well combined.
Heat oil in a 26cm (base) non-stick frying pan over medium heat. Add potato mixture. Stir to coat in oil. Whisk eggs in a jug. Pour eggs over potato mixture. Gently shake frying pan to allow egg to run to the bottom. Cook for 5 minutes, or until base is set.
Preheat grill on medium-high heat. Grill frittata for 7 minutes, or until golden and cooked through. Cut into wedges. Serve with rocket leaves and cranberry sauce.

xXx

Lil Haunts Review/Preview RELEASE....


Last years Lil Haunts release are now available in rubber from Tickled Pink Stamps and to celebrate we're having a review - some of the Pink Ladies have created something new and others are re-showcasing favourites from the past! You can check out all the fun on our BLOG

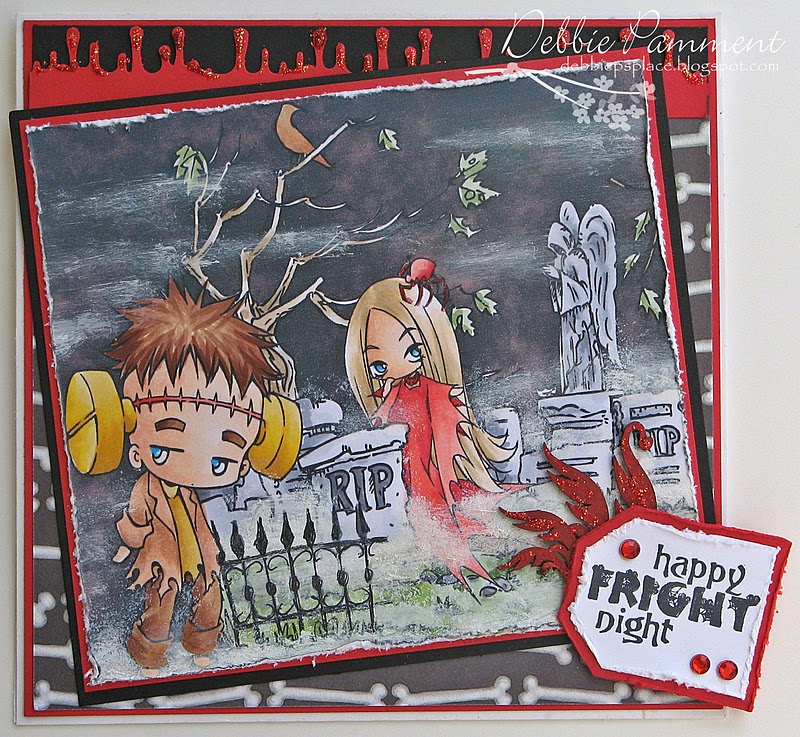
I've used Lil Haunts Frankie Frankenstein for my card - he's such a fun a quirky guy! And the sentiment and die are from this year's Spinks and Spooks release from Tickled Pink Stamps.

Copics used - E11, E00, E000, V17, V15, V12, YG17, YG05, YG01, YR07, YR04, YR00, C6, C4, C2, C1, C0, C00

xXx

Monday, September 26, 2011

The Craft's Meow Preview - As We Gather Together


Today is Day One of five fabulous previews for The Craft's Meow's October 1st release. Over the next five days you'll get to see these wonderful Fall/Thanksgiving sets being previewed by the DT - check out the details on OUR BLOG. Since it's Spring here in Australia and we don't celebrate Thanksgiving I decided to come up with a fun project to showcase the versatility of these sets and I created a recipe set! 

Each recipe was chosen to co-ordinate with the images from each set - and today's set is As We Gather Together by Kaitlyn Ord. I've taken the pumpkin image and the harvest sentiment and added a Pumpkin Pie recipe inside. Each day there will be a new image and a new recipe - so I hope you can come and visit and hopefully take away some recipes and ideas for these sets.

Here's today's recipe for you....

Pumpkin pie 
Ingredients (serves 6)
2 cups pumpkin puree  
3 eggs
1 1/2 cups thickened cream, plus extra to serve
185g brown sugar
1 1/2 tsp ground cinnamon
1 tsp ground ginger
1/2 tsp nutmeg
1/4 tsp ground cloves
1/4 tsp allspice
Maple syrup, to serve
Icing sugar, to dust
Pastry
250g plain flour
110g pure icing sugar, sifted
110g unsalted butter, chilled, cubed
1 egg

Method
To make the pastry, place the flour and icing sugar in a food processor and pulse for a few seconds. Add butter and process until the mixture resembles fine breadcrumbs. Add the egg and process until the mixture forms a ball. Cover in plastic wrap and refrigerate for 30 minutes.
Once chilled, roll pastry out on a lightly floured workbench and use to line a lightly greased 23cm fluted loose-bottomed tart pan. Refrigerate for 30 minutes to chill.
Preheat oven to 180°C. Line the pan with baking paper, fill with rice and blind-bake for 10 minutes. Increase oven temperature to 220°C. Place pumpkin puree, eggs, cream, sugar and spices in a processor and whiz until smooth. Pour into the tart shell, then bake for 10 minutes. Reduce oven temperature to 150°C and bake for a further 30-40 minutes. Cool, then serve with the extra cream, a drizzle of maple syrup and dusting of icing sugar.

xXx

Sunday, September 25, 2011

Magnolia Down Under Challenge #115


This week over at Magnolia Down Under Challenges we have a fun challenge for you - Fancy Folds. I tried something I haven't done before and made a Surprise Pop-Up Card based on the tutorial HERE (although my measurements are completely different the principal is the same).

The idea with this card is that it doesn't open up - instead you pull the tab at the top to reveal a secret message and your image turns into a mini easel card. The tab also reveals a spot to write your personal greeting.

Don't forget to check out what other Fancy Folds the rest of the DT have come up with on our blog HERE.


Copics used - E44, E43, E42, E41, E40, E11, E08, E00, E000, R20, R11, G28, G24, G21, W2, W1, W00, YR23, Y35, Y21, Y000

xXx

Saturday, September 24, 2011

Make It Colourful - Adding a White Mist


This week at Make It Colourful we are asking you to add white mist to your scene. Now I thought this challenge was going to be easy - but it was quite scary blotching on white paint AFTER spending time colouring it all up - and being a digi scene I couldn't use much water in case the ink ran - LOL. Parts of my mist are a little more opaque than I'd like but I'm hoping it just adds to whole spooky graveyard scene!

Now don't forget to add your entry to our GALLERY and check out what the amazing MiC DT have done with this challenge and link your entry there too.

Images from Make It Crafty -
Chipboard - 
"Hellish Flames" are from Fluttering Wings

Copics used - E55, E51, E53, E44, E43, E42, E40, E29, E27, E25, E23, E11, E00, E000, Y21, Y19, YR23, B05, B00, R29, R27, R22, R20, YG67, YG63, YG61, YG03, C6, C4, C2, C1, C0, C00

xXx