Pages

Thursday, August 16, 2012

Mo's Dream Team Blog Hop


This month's theme for our Dream Team Blog Hop is brought to you by the fabulous Pops - and her Blog is the start of all the fun. Pops is asking us to use "Summer Tones" for our creations. If you are already hopping along you should have landed here from Alice's Blog.

Luckily for me the Summer fashions are just starting to appear in the shops as we head towards our Aussie Spring and I've noticed pastels seem to be the order of the day! So I decided to take my inspiration from that colour palette. I chose one of Mo's ADORABLE 3 Baby Fairies to use - these cuties in their skimpy little outfits are perfect to depict a hot Summer's day in the garden.

And now it's time to hop on over for some more fun in the sun on Mina's Blog.

Blog Hop order (links can be found under Mo's logo on my left sidebar)
Pops, Jak, Gretha, Kerttu, Jane, Julie, Debby.Y, Heidy, Alice, Debbie,Mina

Copics used - Skin (E11, E00, E000, R20, R11) plus V01, V0000, RV63, RV10, RV00, RV000, Y21, Y08, Y000, E53, E33, YR31, YR30, G28, BG0000

Wednesday, August 15, 2012

Tickled Pink Stamps is Sponsoring ABC Challenges


This week Tickled Pink Stamps is proudly sponsoring ABC Challenges where this week "V for Vanish" - there needs to be something hidden on your creation. 

I decided to hide away my sentiment and used Lil Hauts Ghost Willow on the front. The card is a gate fold card but when you open it up the "curtains" open up the the circle and the missing sentiment appears. I know this type of card has a specific name but can't think of it for the life of me!


 Here you can see the sentiment appearing as the card opens and the "curtains" are drawn.
And here you can see the sentiment is revealed now the card is fully open. And there's a spot to write a message below. It was so much fun to create something a little different and my son is having a heap of fun opening and closing it - nice to see him admiring my work for a change - LOL.
Copics Used - Skin (E02, E000, R22, R11) plus E44, E43, E42, E41, E40, B06, B05, B02, B00, B000, B0000 

Monday, August 13, 2012

Framing Mini World Magnolias with Scrapmatts


When I saw these gorgeous layered frames from Scrapmatts I just KNEW I wanted to use one of them with some Mini World Magnolias and how cute do they look sitting on the ledge?!?!?! The frames were easily coloured with copics, white ink and a gel pen to give each section definition - and a small piece of DP was added to the base piece before the rest of the frame was put together.

And now for a cheeky trick I used - I didn't have enough of this DP to cut out the backing piece for the frame as well as for the card back so I worked out my layout and cut a piece out - if you pull everything off the front of the card you would find a rectangular hole hidden by the flowers, frame and doily! I often do this sort of thing with the backing card - cutting out a matching shape with my nesties to frame and image.

Copics used - Skintones (E11, E00, E000, R20, R11) plus E44, E43, E42, E40, R89, R85, R83, R81, C5,C4, C2, C00, B97, B34, B21, G24

Sunday, August 12, 2012

Magnolia Down Under Challenge # 159


This week are Magnolia Down Under Challenges we are asking for a card and matching gift tag. I decided to play "cat and mouse" with my pair - though I'm not sure the cat is too interested in the mouse Tilda is holding, he seems quite relaxed -  LOL.

For my card I used some Magnolia DP and dies - the snowflake, fence and tree. I embossed some windy swirls into the background behind Tilda to make sure her hair blows about ;-)

For my gift tag I used similar elements with the adorable Magnolia Cat. There is space on the back to add a message. Don't forget to check out the inspiration from the rest of the amazing MDUC DT on our BLOG.

Copics Used - Skin (E11, E00, E000, R20, R11) plus B97, B34, B21, W7, W5, W3, W2, W1, W00, E44, E43, E42, E41, E40, YR23

Friday, August 10, 2012

More Than Two Folds with La La Land


This week at La La Land Crafts we are creating using more than 2 folds. I made a heart shaped easel card using "postage" hearts cut out with my Cameo - the pattern was available in the Silhouette store. I embossed the red background with my cuttlebug heart folder and used some DP to add some pattern to the banner and rolled roses.

Don't forget to check out the rest of the inspiration from the LLLC DT on our BLOG.


Copics Used - 
Skin - E11, E00, E000, R20, R11
Hair - E50, E33, E31, YR31
Clothes - BG57, BG53, BG49, E39, E37, E53, E31, T2, T0
Hearts and Hair Baubles - R39, R27, R22

Sentiment from The Craft's Meow - All You Need is Love set

Wednesday, August 8, 2012

Tickled Pink Stamps is Sponsoring Creative Inspirations


This week Tickled Pink Stamps is proudly sponsoring Creative Inspirations with a challenge of Anything Goes. I decided to combine this challenge with some fabulous chipboard products from Australian company Scrapmatts - especially as I'm proudly guest designing for them for the month of August. The golden cog frame and other cog chippies worked so well together with Lil Victorian Steampunk Lad Luca

Scrapmatts Products - 
Gears 03 in natural and black (cut down to suit)
Assorted Words 02 inked with black and glittered with Gel Pen

Copics Used - Skin {E11, E00, E000, R11} plus W7, W5, W3, W1, W00, C1, C0, C00, BG99, BG96, BG93, Y28, Y26, Y23, E40, E39, E37, E35, E33, E31, E29

Monday, August 6, 2012

It's a Wonderful Day


With Spring less than a month away for us here in Australia the trees are budding and the birds are starting to sing in the mornings - I love watching Mother Earth come back to life. This gorgeous image by Mo Manning is called Wonderful Day and suited my mood perfectly after a chilly wander around the garden.

I've paired her with some chipboard from Scrapmatts - the 2 layer leaves, birdbath and sentiment all adding interest and texture.

Copics used - Skin (E11, E00, E000, R210, R11) plus E19, E08, YR07, YR04, YR02, B97, B34, B32, G40, G28, G24, G21, G20, R39, W2, W1, W00

Sunday, August 5, 2012

Magnolia Down Under Challenge #158


This week at Magnolia Down Under Challenges we have a fabulous sketch for you to play along with. I admit it's not my week to play along with the team but it's such a gorgeous sketch - and in all honestly I plucked the wrong sketch when I made a card for a previous challenge - LOL. But I'm sooo glad I did because this is one of my fave Magnolia cards of mine - I love the cheeky little dragon and Wizard Tilda!

Don't forget to pop on over to the Magnolia Down Under Blog to check out the rest of the fabulous inspiration by our marvellous DT.

Copics used - Skin (E11, E00, E000, R20, R11) plus BG18, BG15, BG13, BG11, BG10, BG0000, YG17, C2, C00, B000, Y11, Y08, Y0000, E47, E44, E43, E42, E41, E40, YR07

Friday, August 3, 2012

La La Land Goes Monochromatic


This week the team at La La Land are going monochromatic. I decided to use dusty pinks and thought they'd work well with the adorable Angel Marci. I found this fabulous DP which was perfect to pop Marci onto with it's in-built sentiment. 

Unfortunately I can't show you Marci "flying" around. I popped her onto the card using one of these 'wobblers' and she looks soo cute when you move the card. I tried to video it for you but had issues uploading my video here so you'll just have to take my word for how fun it looks - even my 13yo son enjoyed making her 'fly' - LOL.

Don't forget to check out what the rest of the DT have come up with for this challenge - they are one talented bunch and you can check out their work on the LLLC BLOG.

La La Land Products

Copics Used
Skin - E11, E00, E000, R20, R11, (R22 lips)
Roses - R24, R22, R20, G21
Clothes, Wings and Hair - W3, W1, W00, R20, R00, R000


Thursday, August 2, 2012

Thunder and Lightning, Very Very Frightening....


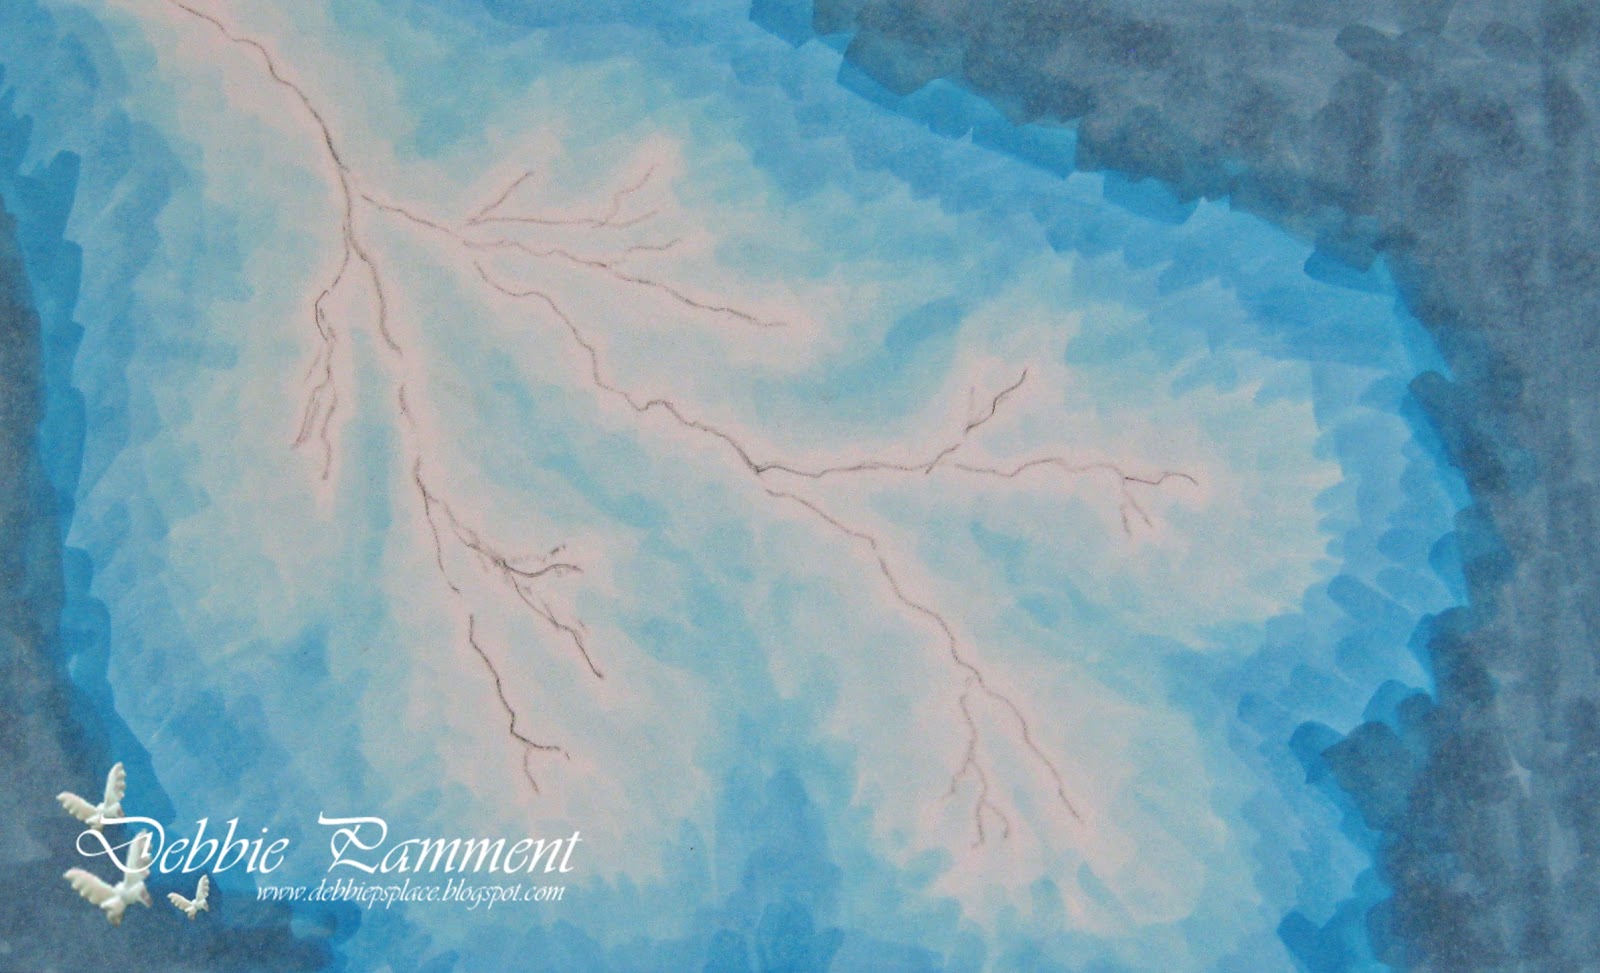
Last year the Make it Crafty gals set a challenge to colour lighting. Now I have to say it scared me when I read the challenge and I had to think long and hard about HOW to start. As I often tell people drawing is NOT a skill I can lay claim to - LOL. So how to create lightning????? I finally figured out a way so I thought I'd share it here with you.

Google is my friend - and I'm sure many of you can relate! I started the challenge by googling lightning images and finding this one which I saved to my computer. Print out the picture to the size you want.


Using some tracing paper trace the lightning - this does NOT have to be accurate - no-one will know where your original picture looked like and it's just used as a guide. You can orientate the lightning to suit your picture - in the picture I coloured for the original challenge I down-sized the lightning and pointed it upward - see below....


You'll see I finished the lightning off with some yellow in this picture - it has ALWAYS annoyed me that I took this extra step and you'll see I don't use it in this version! Now back to our lightning.... 


Transfer the lightning onto your colouring medium - use a soft pencil as you want to erase this line later. I start with the lightest colour to "set the scene". Make sure you place this as a border around your lightning line as you want to leave the lightning area white.


Gradually build out the colour and blend slightly. I find it easier to flick my colour towards the lighter colour as I'm fairly heavy handed and the hard edge where I start will be covered by the next and darker layer.


Keep adding your colours and blending lightly as you go. Then go backwards from darkest back to lightest to keep blending and adding definition to your lightning forks.


You don't need to get the the blending completely smooth - but you can see how much better it looks with a little bit of work.


When you are happy with the result erase the pencil marks and there you go - lightning! And don't you agree it looks much better without the yellow?!?!?!


Make it Crafty Products - 

Previous Picture MiC Products - 

Copics used - B0000, B000, B00, B02, B05, B06, B97