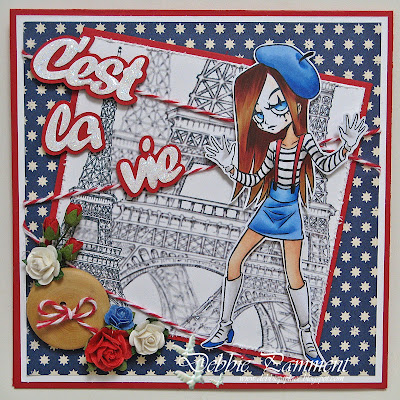
I had a few people mention they didn't know how to layer digis like I did for the background of my card yesterday so I offered to do up a little tutorial. But being the kind of anal person I am I know I NEED step by step pictures so I have done the same for you so this post is a little 'picture heavy' - LOL.
Make it Crafty uses png images with invisible backgrounds which makes it soooo easy to layer up. Other digi companies may not offer these which means you have to spend time deleting backgrounds to allow the images to layer properly. Try the "magic wand" tool to do this, but if that doesn't work you'll have to use the eraser and that can take a LOT of time and patience!
I use a free downloadable program called paint.NET - and it comes in both windows and mac versions though I have the windows version. You can find it by using "google". So here goes - any questions just ask - and leave me your email address so I can try and answer!
Open up paint.NET and then go to the "file" tab and find the "open" button - this leads you to your files where you can find the image file you want to use.
Once you have your image in you may want to blur it a little to make it recede more into the background so it gives your image depth.
Use the "Effects" tab and drop down to "blurs" and then to "unfocus". A window will pop up to let you choose how much you want to blur your image. I only used #4 for my first image - but you can play and work out what suits you. I was only layering up 4 images so I decreased the amount of blur by 1 for each.
Be aware though - in this program once you layer on the next image you can't change the earlier ones without re-doing it all so pan ahead.
Next you need to give yourself a bigger space to work on so you'll need to increase your canvas size. Go to the "image" tab to do this.
A window will pop up letting you work out how much more space you need and where you want your original image to sit. Remember to go bigger than you think you need - you can always crop back later!
I just added extra width to the left of my canvas. The new screen will look like this with the white part the extra space. You can make this part "invisible" by clicking on the "tools" tab, selecting the magic wand tool, right click on the white background (it will turn blue) and hit delete.
Now you need to add in your next image. To do this go the the "layers"tab and drop down to "import from file". Find the image you want to layer up when the files window opens and open it up. The new image probably won't be in the right spot so drag it where you want it to be.
This image imported at the same size as the original one - all I've done is drag the corner to enlarge and moved it where I want it to be. I then added a #3 blur like I did before.
Keep Layering and blurring as before until you are happy with the effect. If you make a mistake you can always hit the "un-do" arrow (it curves backwards). This button takes you back one step at a time.
I then just cropped to suit the look I wanted.
I always save my "merged images". To do this you need to use the "save as" function - or your new image will save in the name your orginal file was and overwrite it. I speak from experience when I say that sounds like common sense - but when you've been playing around with images it's a step easy to forget!!! This program will save in a paint.Net file so use the drop down menu to save as either a jpeg or png file. You can also use this funtion to change images from one format to another FYI!
Two windows will pop up to complete the save - one is a "save configuration" window - just hit OK. The other asks you to "flatten" the image - this just finishes merging the 4 layers into one.
There, you're DONE! You now have this file in your folder and can import and print it out like you do any other digi!
I use the same basic principles to merge all my images - although I don't often use just ONE image and this is the first time I've used the "blur" effect.
I hope this has been helpful.....


