Pages

Saturday, November 16, 2024

A Little Christmas Bauble


Today I'm bringing you a little Christmas bauble I decorated using Merry Mousemas from Mo Manning. 

Here's a little tutorial on how I did it :)

1. I layered the image onto a digital paper I had set inside a circle, the circle isn't necessary as it gets trimmed back anyway. Make sure you measure so your image fits the bauble. I printed this onto regular printer paper as it's light weight and will mould around the curve of the bauble. I then carefully coloured the image. Be careful not to saturate the paper with ink if you use markers as it will bleed easily.


2. I then ran a wet q tip around the edge so the paper would tear easily. I do this because torn edges blend better and don't leave a hard ridge.


3. To protect the design I painted the back with mod podge and let it dry.


4. Remove the silver top and paint the bauble with sealer and then sponge on a coat of paint. Mod podge the image onto the front.
5. Using silicone molds create some 3D elements to border the image. I used holly leaves and rope molds with paper clay. Glue these pieces onto the bauble before they dry so they will mold around the curve easily. 

The paper clay I used was red as as that was all I had. It was also a bit old so it was a bit crumbly. I am going to try and make some for future projects, there are plenty of versions online if you Google.
6. Glue on the elements. Paint the bauble in your chosen colour, including the paper clay border.
7. Protect your image area and then splatter some paint all over the bauble with whatever method you prefer, I used a toothbrush. The colours I used were dark brown. white and metallic gold.

8. Uncover the image and paint the paper clay elements. Varnish. I used high gloss but satin would be lovely too. Add the top back onto the bauble and hang.

If you give this a go I hope you have fun with it.

This project was inspired by the amazing artist I found on YouTube - Inspirations from the Soul


Saturday, November 2, 2024

Pretty in Pink - Christmas Cookies by Mo Manning


Today I'm bringing you a card made using Mo Manning's fabulous Christmas Cookies image. I decided to use non traditional colours and went with pink and silver, and I think she looks fabulous. 

I found a Gingerbread Cookie recipe and used the ingredient list as the background. Then I added some die cut festive elements in the corner. I applied some glitter to all the "fur" on her clothes and the die cut pinecones to add the Christmas sparkle

Thursday, October 24, 2024

CASE me a Christmas Card with Michelle Lupton


I always love it when my friend Michelle Lupton contacts me to ask if I want to be a part of her "Case me a Christmas Card" challenge, especially as she was unable to commit to one last year. She has some amazing artists on board taking part in her challenge and, it's always fun to see how people interpret each other's work, especially when styles can vary so much.

This is the card I chose to CASE this year. I used Michelle's basic layout of a coloured central background with an image on top, a simple stamped sentiment and white die cuts. Of course with it being Christmas I had to add some sparkle with glitter and rhinestones. For my card I used one of the gorgeous Christmas images from Polkadoodles Stamps called Watch Your Step.
Michelle's work is always so beautifully elegant, and I hope I've done her design concept justice.

You can check out how Michelle CASE'd one of my cards HERE

Saturday, October 19, 2024

Crossed Arm Fairy by Mo Manning


My DT make for Mo's Dream Team this week uses one of her fabulous fairies. Mo has sweet fairies, Christmas fairies, adult fairies and those with a bit of attitude. This gorgeous image definitely has attitude and is called Crossed Arm Fairy. Mo also has a cheeky version of this cutie "flipping off" if you prefer. You cane find that version HERE.

Saturday, October 5, 2024

Fay and Frank by Mo Manning


It's October so I guess Halloween is on it's way 😏 We don't really celebrate it here in Australia but that doesn't mean I can't have fun playing. These cuties are Fay and Frank. I used a brighter colour palette for the image as I felt the background papers were dark enough. It also helps tie in with my preferred white card base.

I hadn't planned on adding any jewels to her hair but I may have dropped an open ink pad onto her as I was making up the card and it seemed a good time to embellish 😂 I actually love the bit of sparkle they add so I guess it was meant to be.

Saturday, September 21, 2024

Peggy by Mo Manning


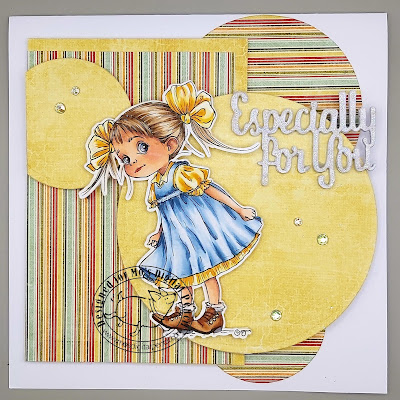
I just LOVE this sweet image by Mo Manning, this is Peggy. I know I've coloured her up recently, but she really is too adorable not to use again and again, and the colour combo makes such a difference to the feel of the card. Last time I coloured her I used pink and black, which gave her a much edgier feel. This combo is all sweetness and light.

If you're interesested you can check out my other card HERE.

Saturday, September 7, 2024

Val by Mo Manning


My latest DT make for Mo's digital pencil is this fun card using Val. I've had her siting there waiting to be coloured up for some time. Mo really does make designing easy with the ready coloured heart and sentiment included.

Saturday, August 17, 2024

Gnome Alone by Mo Manning


Anyone who knows me well knows I love Tomte Gnomes and this cutie from Mo Manning is called Gnome Alone. Now I know he's supposed to be a Christmas image but I think he works perfectly fine for this scenario too. I love an image that has multiple uses.

I created the background paper on my computer, it's pretty easy as it's just a coloured text box with text. I love to do this occasionally as it adds another dimension to your card.

Saturday, August 3, 2024

Urchin with Bird by Mo Manning


This little cutie is Mo's Urchin with Bird and is perfect for a chilly Melbourne winter vibe. I die cut some Birch Tree's using a die from La-La Land Crafts and added a little more detail to them. An embossed snow falling background and snow drifts came together with the trees for a perfect background for her.

Saturday, July 20, 2024

Mermaid and Starfish by Mo Manning


This week I've coloured up Mo's adorable Mermaid and Starfish image. She's such a sweetheart and I loved doing her in a mix of pink and green. I have used clear Wink of Stella on her tail and some of the headpiece to add a subtle glitter to her, but the chipboard sentiment is fully glittered - as am I now LOL.

Until next time