Pages

Sunday, August 12, 2012

Magnolia Down Under Challenge # 159


This week are Magnolia Down Under Challenges we are asking for a card and matching gift tag. I decided to play "cat and mouse" with my pair - though I'm not sure the cat is too interested in the mouse Tilda is holding, he seems quite relaxed -  LOL.

For my card I used some Magnolia DP and dies - the snowflake, fence and tree. I embossed some windy swirls into the background behind Tilda to make sure her hair blows about ;-)

For my gift tag I used similar elements with the adorable Magnolia Cat. There is space on the back to add a message. Don't forget to check out the inspiration from the rest of the amazing MDUC DT on our BLOG.

Copics Used - Skin (E11, E00, E000, R20, R11) plus B97, B34, B21, W7, W5, W3, W2, W1, W00, E44, E43, E42, E41, E40, YR23

Friday, August 10, 2012

More Than Two Folds with La La Land


This week at La La Land Crafts we are creating using more than 2 folds. I made a heart shaped easel card using "postage" hearts cut out with my Cameo - the pattern was available in the Silhouette store. I embossed the red background with my cuttlebug heart folder and used some DP to add some pattern to the banner and rolled roses.

Don't forget to check out the rest of the inspiration from the LLLC DT on our BLOG.


Copics Used - 
Skin - E11, E00, E000, R20, R11
Hair - E50, E33, E31, YR31
Clothes - BG57, BG53, BG49, E39, E37, E53, E31, T2, T0
Hearts and Hair Baubles - R39, R27, R22

Sentiment from The Craft's Meow - All You Need is Love set

Wednesday, August 8, 2012

Tickled Pink Stamps is Sponsoring Creative Inspirations


This week Tickled Pink Stamps is proudly sponsoring Creative Inspirations with a challenge of Anything Goes. I decided to combine this challenge with some fabulous chipboard products from Australian company Scrapmatts - especially as I'm proudly guest designing for them for the month of August. The golden cog frame and other cog chippies worked so well together with Lil Victorian Steampunk Lad Luca

Scrapmatts Products - 
Gears 03 in natural and black (cut down to suit)
Assorted Words 02 inked with black and glittered with Gel Pen

Copics Used - Skin {E11, E00, E000, R11} plus W7, W5, W3, W1, W00, C1, C0, C00, BG99, BG96, BG93, Y28, Y26, Y23, E40, E39, E37, E35, E33, E31, E29

Monday, August 6, 2012

It's a Wonderful Day


With Spring less than a month away for us here in Australia the trees are budding and the birds are starting to sing in the mornings - I love watching Mother Earth come back to life. This gorgeous image by Mo Manning is called Wonderful Day and suited my mood perfectly after a chilly wander around the garden.

I've paired her with some chipboard from Scrapmatts - the 2 layer leaves, birdbath and sentiment all adding interest and texture.

Copics used - Skin (E11, E00, E000, R210, R11) plus E19, E08, YR07, YR04, YR02, B97, B34, B32, G40, G28, G24, G21, G20, R39, W2, W1, W00

Sunday, August 5, 2012

Magnolia Down Under Challenge #158


This week at Magnolia Down Under Challenges we have a fabulous sketch for you to play along with. I admit it's not my week to play along with the team but it's such a gorgeous sketch - and in all honestly I plucked the wrong sketch when I made a card for a previous challenge - LOL. But I'm sooo glad I did because this is one of my fave Magnolia cards of mine - I love the cheeky little dragon and Wizard Tilda!

Don't forget to pop on over to the Magnolia Down Under Blog to check out the rest of the fabulous inspiration by our marvellous DT.

Copics used - Skin (E11, E00, E000, R20, R11) plus BG18, BG15, BG13, BG11, BG10, BG0000, YG17, C2, C00, B000, Y11, Y08, Y0000, E47, E44, E43, E42, E41, E40, YR07

Friday, August 3, 2012

La La Land Goes Monochromatic


This week the team at La La Land are going monochromatic. I decided to use dusty pinks and thought they'd work well with the adorable Angel Marci. I found this fabulous DP which was perfect to pop Marci onto with it's in-built sentiment. 

Unfortunately I can't show you Marci "flying" around. I popped her onto the card using one of these 'wobblers' and she looks soo cute when you move the card. I tried to video it for you but had issues uploading my video here so you'll just have to take my word for how fun it looks - even my 13yo son enjoyed making her 'fly' - LOL.

Don't forget to check out what the rest of the DT have come up with for this challenge - they are one talented bunch and you can check out their work on the LLLC BLOG.

La La Land Products

Copics Used
Skin - E11, E00, E000, R20, R11, (R22 lips)
Roses - R24, R22, R20, G21
Clothes, Wings and Hair - W3, W1, W00, R20, R00, R000


Thursday, August 2, 2012

Thunder and Lightning, Very Very Frightening....


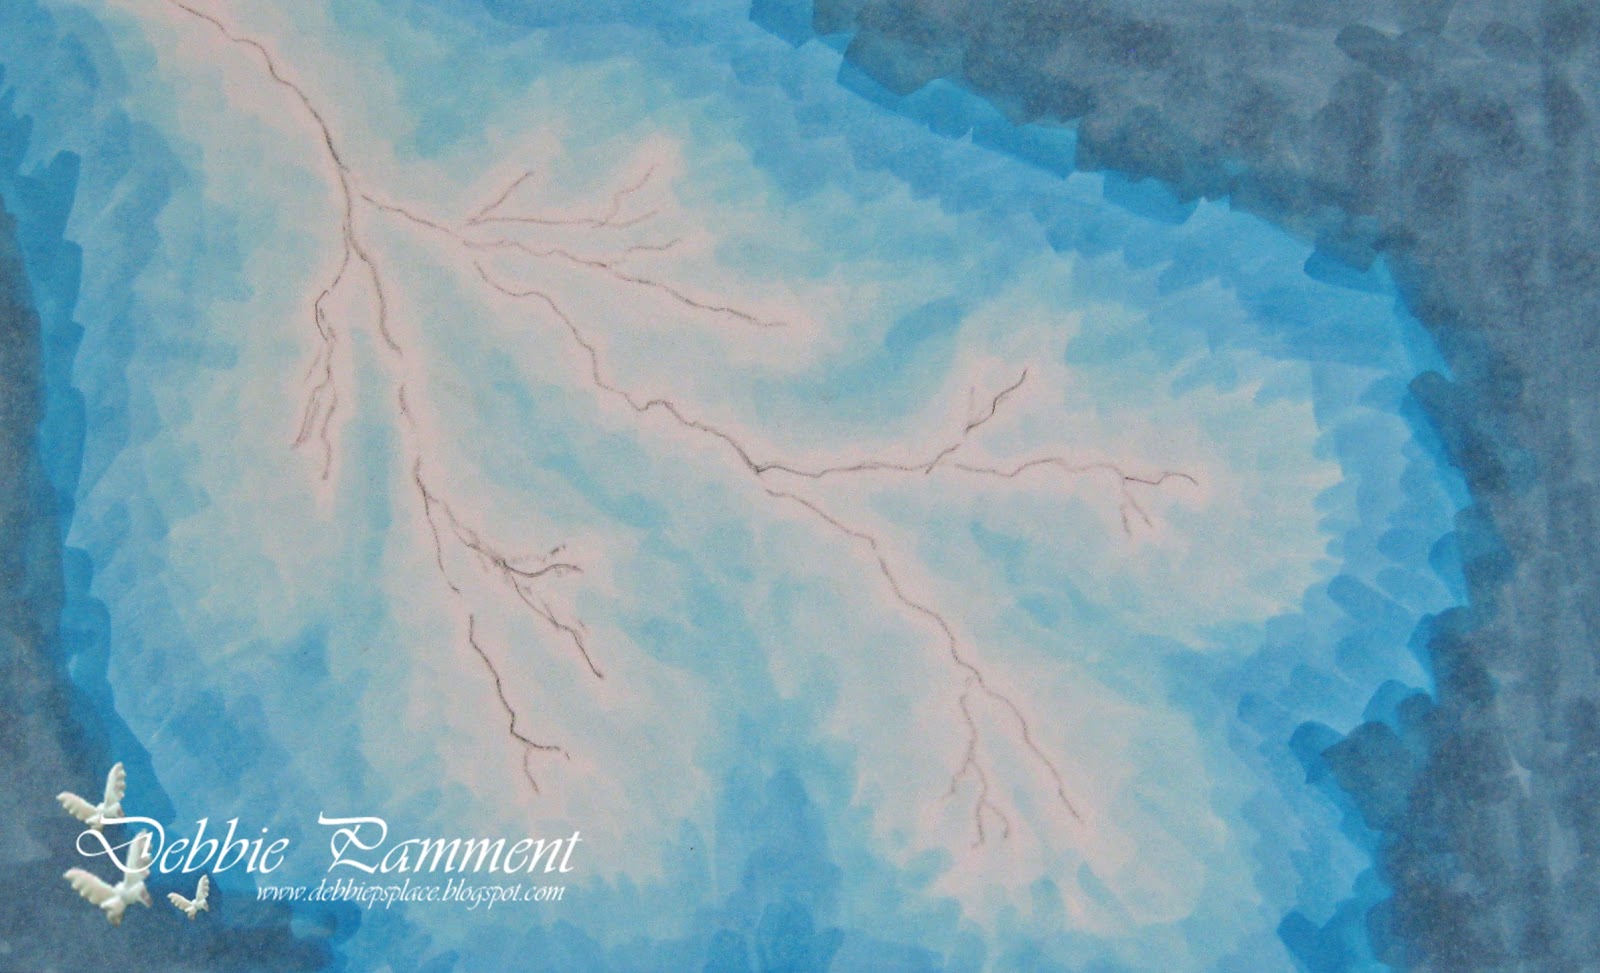
Last year the Make it Crafty gals set a challenge to colour lighting. Now I have to say it scared me when I read the challenge and I had to think long and hard about HOW to start. As I often tell people drawing is NOT a skill I can lay claim to - LOL. So how to create lightning????? I finally figured out a way so I thought I'd share it here with you.

Google is my friend - and I'm sure many of you can relate! I started the challenge by googling lightning images and finding this one which I saved to my computer. Print out the picture to the size you want.


Using some tracing paper trace the lightning - this does NOT have to be accurate - no-one will know where your original picture looked like and it's just used as a guide. You can orientate the lightning to suit your picture - in the picture I coloured for the original challenge I down-sized the lightning and pointed it upward - see below....


You'll see I finished the lightning off with some yellow in this picture - it has ALWAYS annoyed me that I took this extra step and you'll see I don't use it in this version! Now back to our lightning.... 


Transfer the lightning onto your colouring medium - use a soft pencil as you want to erase this line later. I start with the lightest colour to "set the scene". Make sure you place this as a border around your lightning line as you want to leave the lightning area white.


Gradually build out the colour and blend slightly. I find it easier to flick my colour towards the lighter colour as I'm fairly heavy handed and the hard edge where I start will be covered by the next and darker layer.


Keep adding your colours and blending lightly as you go. Then go backwards from darkest back to lightest to keep blending and adding definition to your lightning forks.


You don't need to get the the blending completely smooth - but you can see how much better it looks with a little bit of work.


When you are happy with the result erase the pencil marks and there you go - lightning! And don't you agree it looks much better without the yellow?!?!?!


Make it Crafty Products - 

Previous Picture MiC Products - 

Copics used - B0000, B000, B00, B02, B05, B06, B97

Sunday, July 29, 2012

Magnolia Down Under Challenge #157


This week at Magnolia Down Under Challenges we are making or altering BOXES. I decided it was time to create something with a more masculine feel to it so I cut out this treasure chest with my cameo and decorated it. Of course it is filled with gold (and chocolate) so I'm sure any pirates I have around will enjoy it - even though Pirate Edwin is on guard with his sword unsheathed - LOL.

I added some chipboard elements from Scrapmatts  which are not only decorative but practical too - the ship wheel helps to hold the chest closed. I've used my copper gelly roll pen from Scrapmatts to colour the chipboard - it gives it a fabulous rich glow when the light hits it. The "bubbles" are buttons I found at the recent craft show I went too.

And so me hearty's - don't forget to sail on over to the Magnolia Down Under Blog to see what the rest of my shipmates have created to inspire you this week.

Copics used - Skintones {E11, E00, E000, R11} plus 100, W7, W3, W1, Y28, Y26, Y23, Y08, R59, R39, R17, E29, E25, E23, YG61


Friday, July 27, 2012

Seeing Circles at La La Land Crafts


This week at La La Land Crafts we've been asked to create circle cards. Now I went a little interpretive with my card but did get the go ahead from the lovely Irina. The teapot is basically a circle - albeit a bit out of shape with added bits - LOL. But the base IS a circle. I've used the top of LLLC's Heart Tree die on the bottom as a trivet or doily - it shows the versatility of these amazing dies! 

I cut the tea pot out using my Cameo - from a pattern available in the Silhouette store. Of course I DO know  you usually pop tea bags INSIDE the tea pot but then you wouldn't have seen them - LOL.

Don't forget to pop over to the LLLC Blog to check out what the rest of my teamies have been up too.

La La Land Products used - 

Copics used - 
Skin - E11, E00, E000, R20, R11 (lips R24)
Hair - E44, E43, E42, E41, E40
Clothes - R27, R24, R22, R20, 100, C8, C6, C5, C4, C1, C00, G46, G43
Tea Cup - R27, R24, R22, R20, G46, G43, YR20, YR0000
Tea Bags - E44, E43, E42, E41, E40


Wednesday, July 25, 2012

Alisa in Green


Green is my favourite colour and recently a friend of mine reminded me how beautiful cards done in green can be. I was inspired to colour up Mo Manning's Alisa with Roses in green tonings. She's such a gorgeous image that I felt she deserved to be framed with this beautiful chipboard frame from Make it Crafty and I blinged it up with my gelly roll pen over green copic - it gives a more delicate sparkle than using glitter.

Copics used - Skintones (E11, E00, E000, R20, R11) plus YG67, YG63, G21, G20, R85, R83, R81, R59, Y21, W1, W00, E35, E33, E31, E30, E08